


Setting Up a Domain Controller in Windows Server


This guide walks you through the process of configuring a Windows Server as a domain controller using Active Directory Domain Services (AD DS).
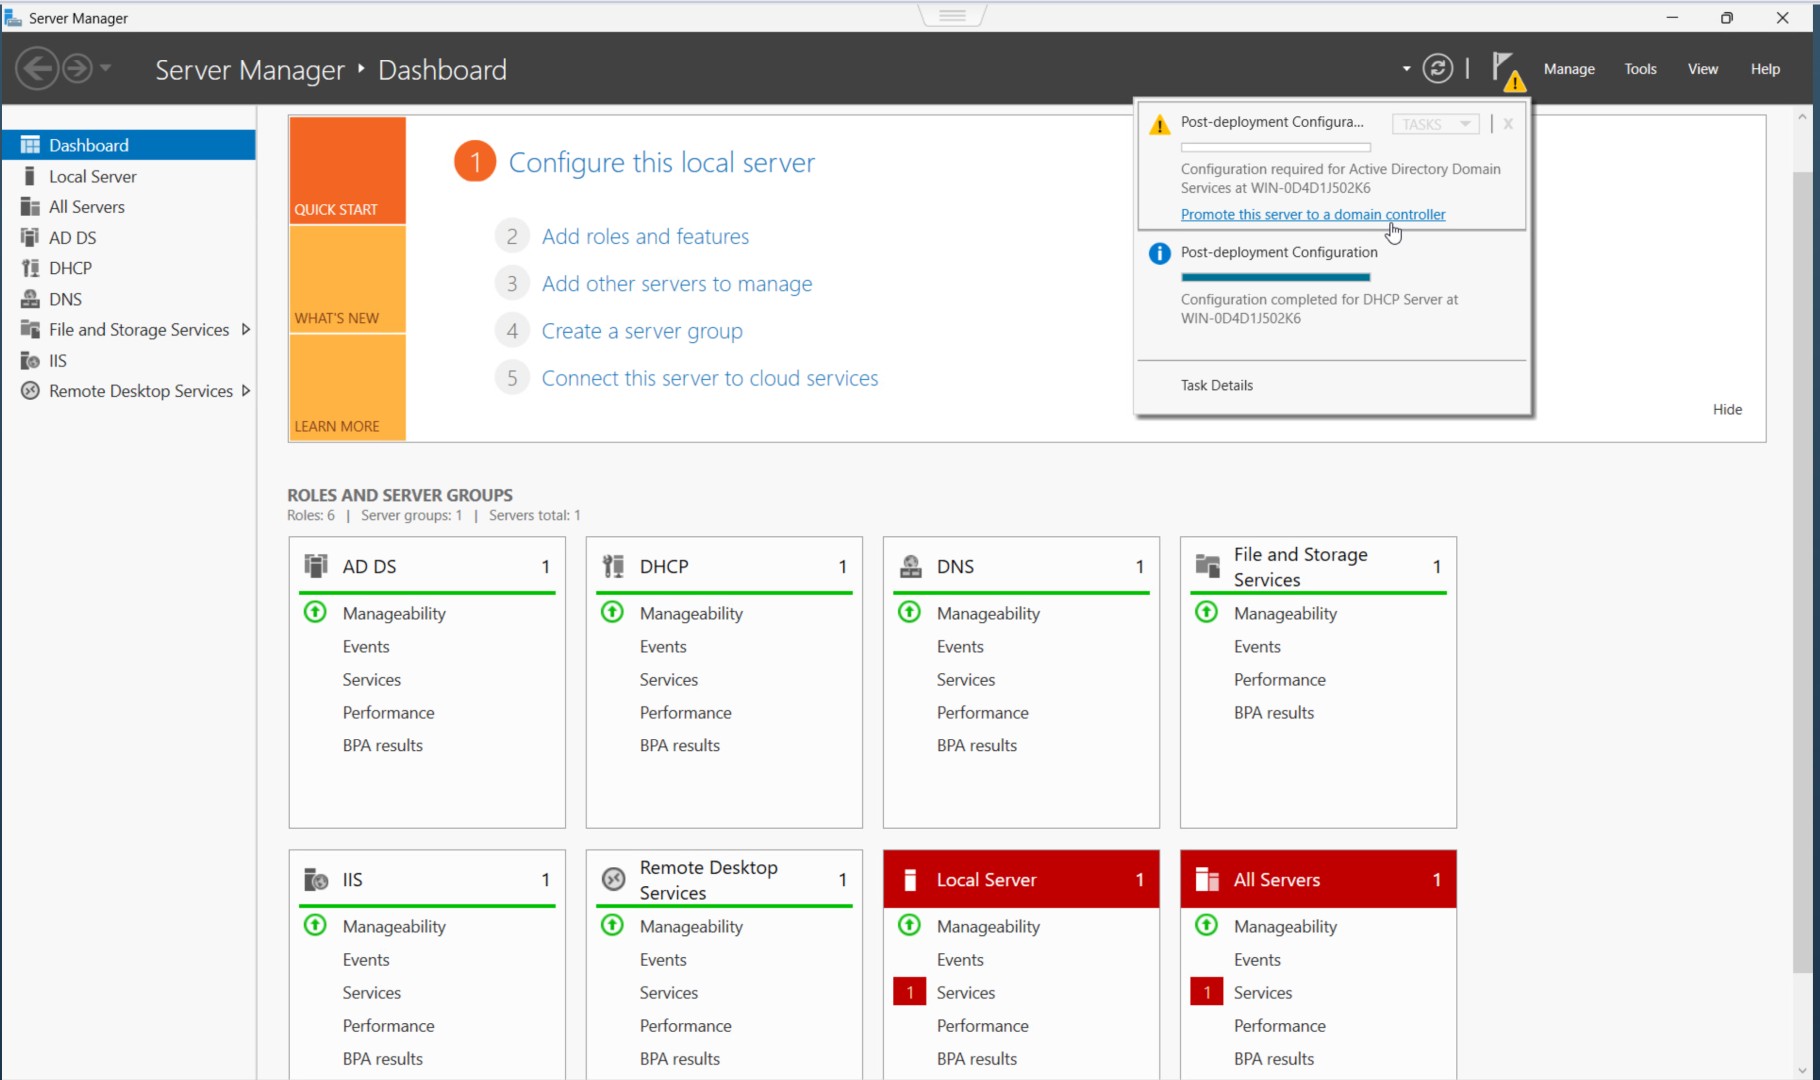
Step 1: Open Server Manager and Start Configuration
In Server Manager, you'll see a notification under Post-deployment Configuration. Click "Promote this server to a domain controller".
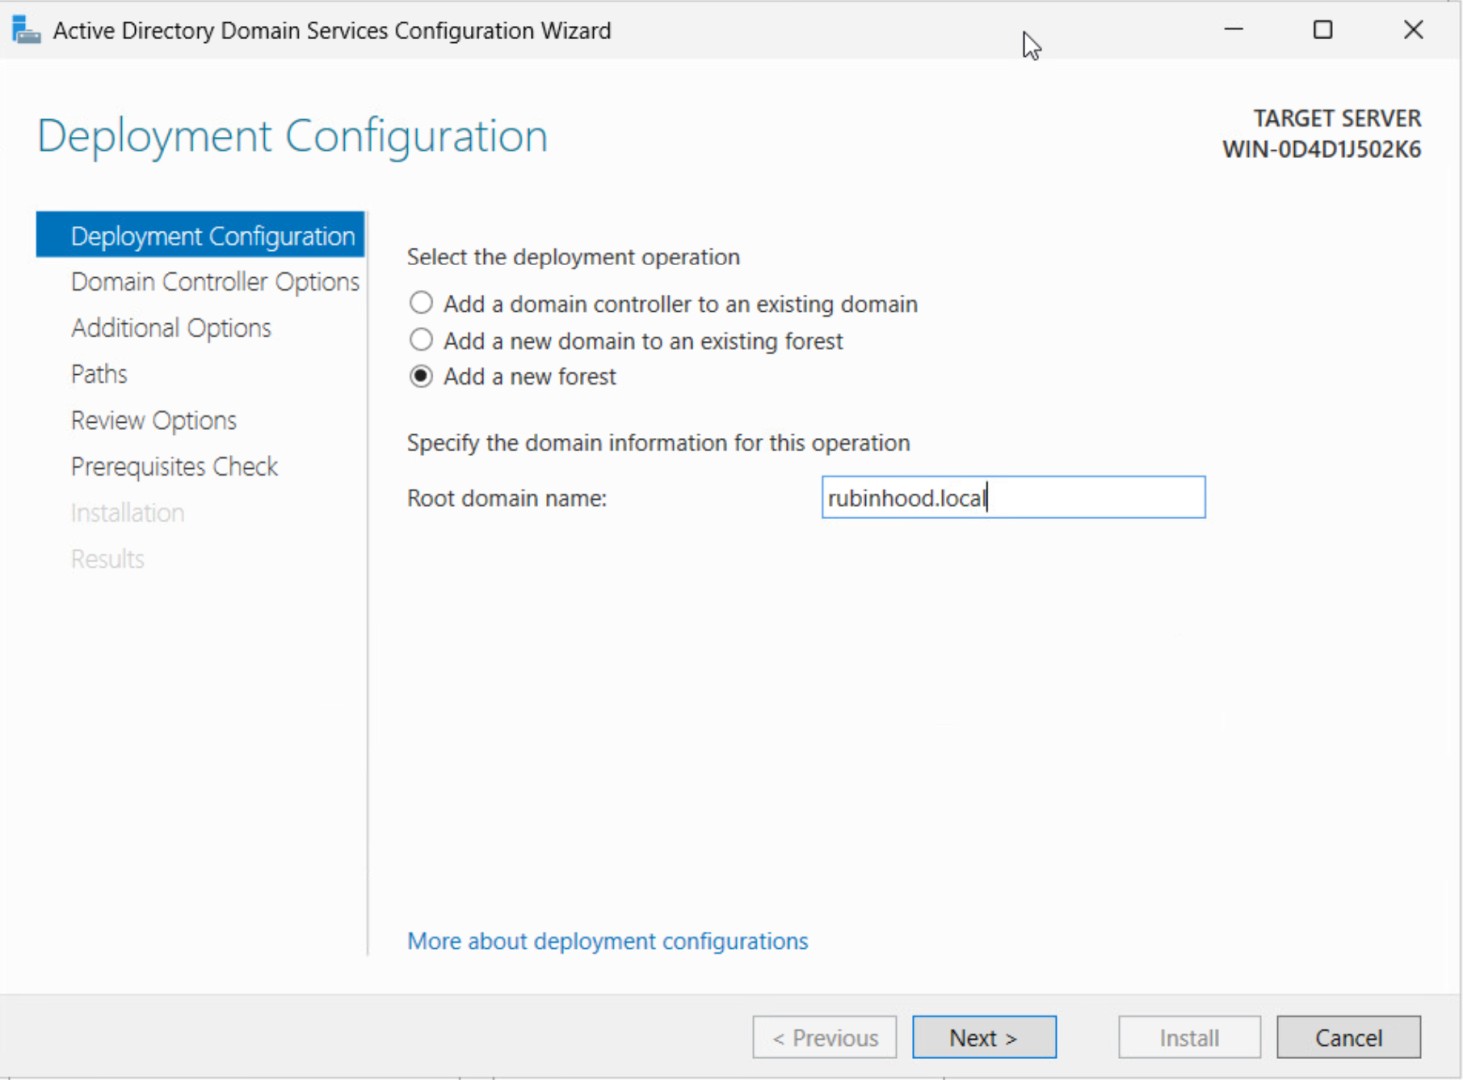
Step 2: Deployment Configuration
Select "Add a new forest", then enter your Root domain name (e.g., rubinhood.local).
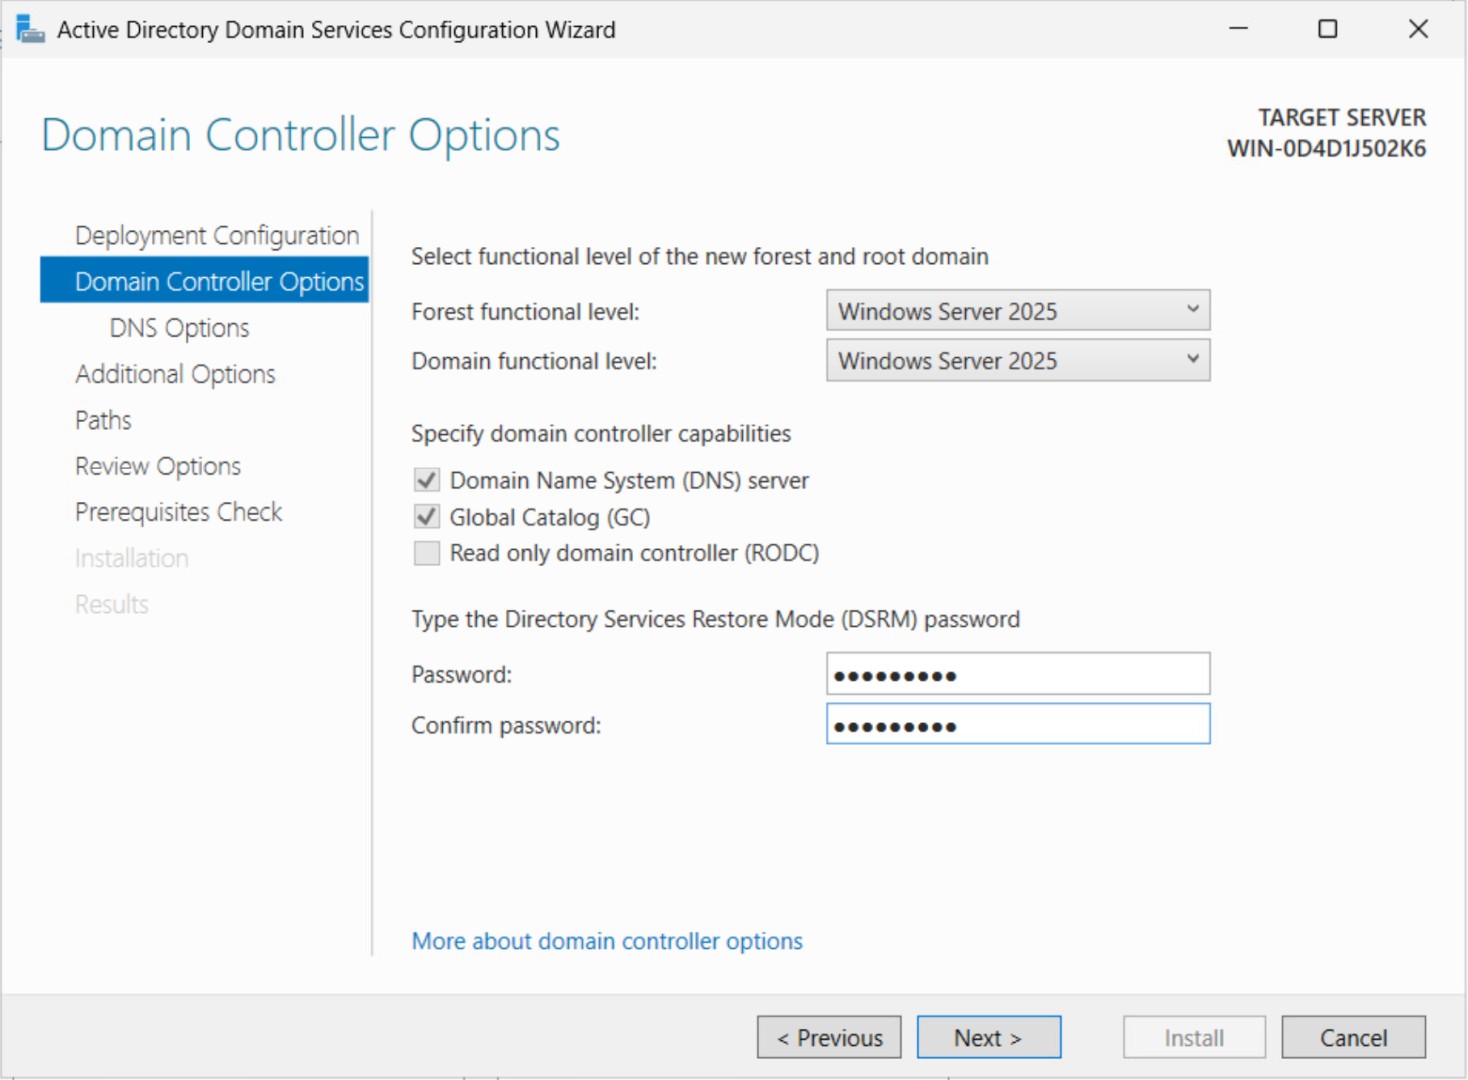
Step 3: Configure Domain Controller Options
- Set the Forest Functional Level and Domain Functional Level (e.g., Windows Server 2025).
- Enable DNS Server and Global Catalog (GC).
- Set a DSRM (Directory Services Restore Mode) password.
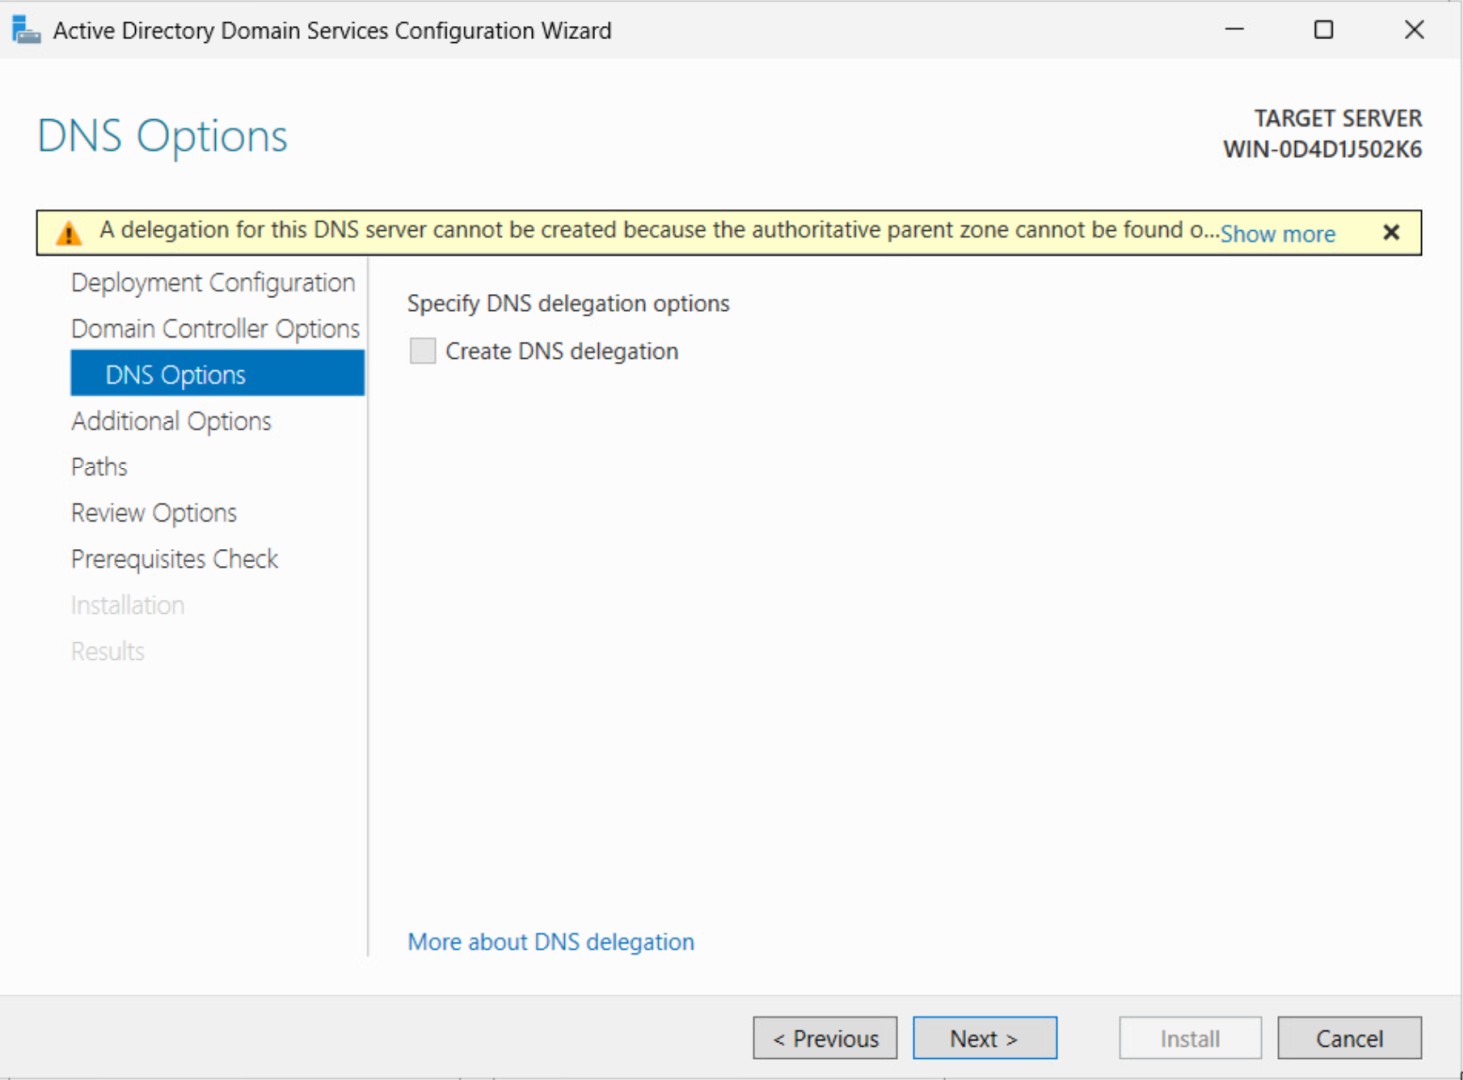
Step 4: Configure DNS Options
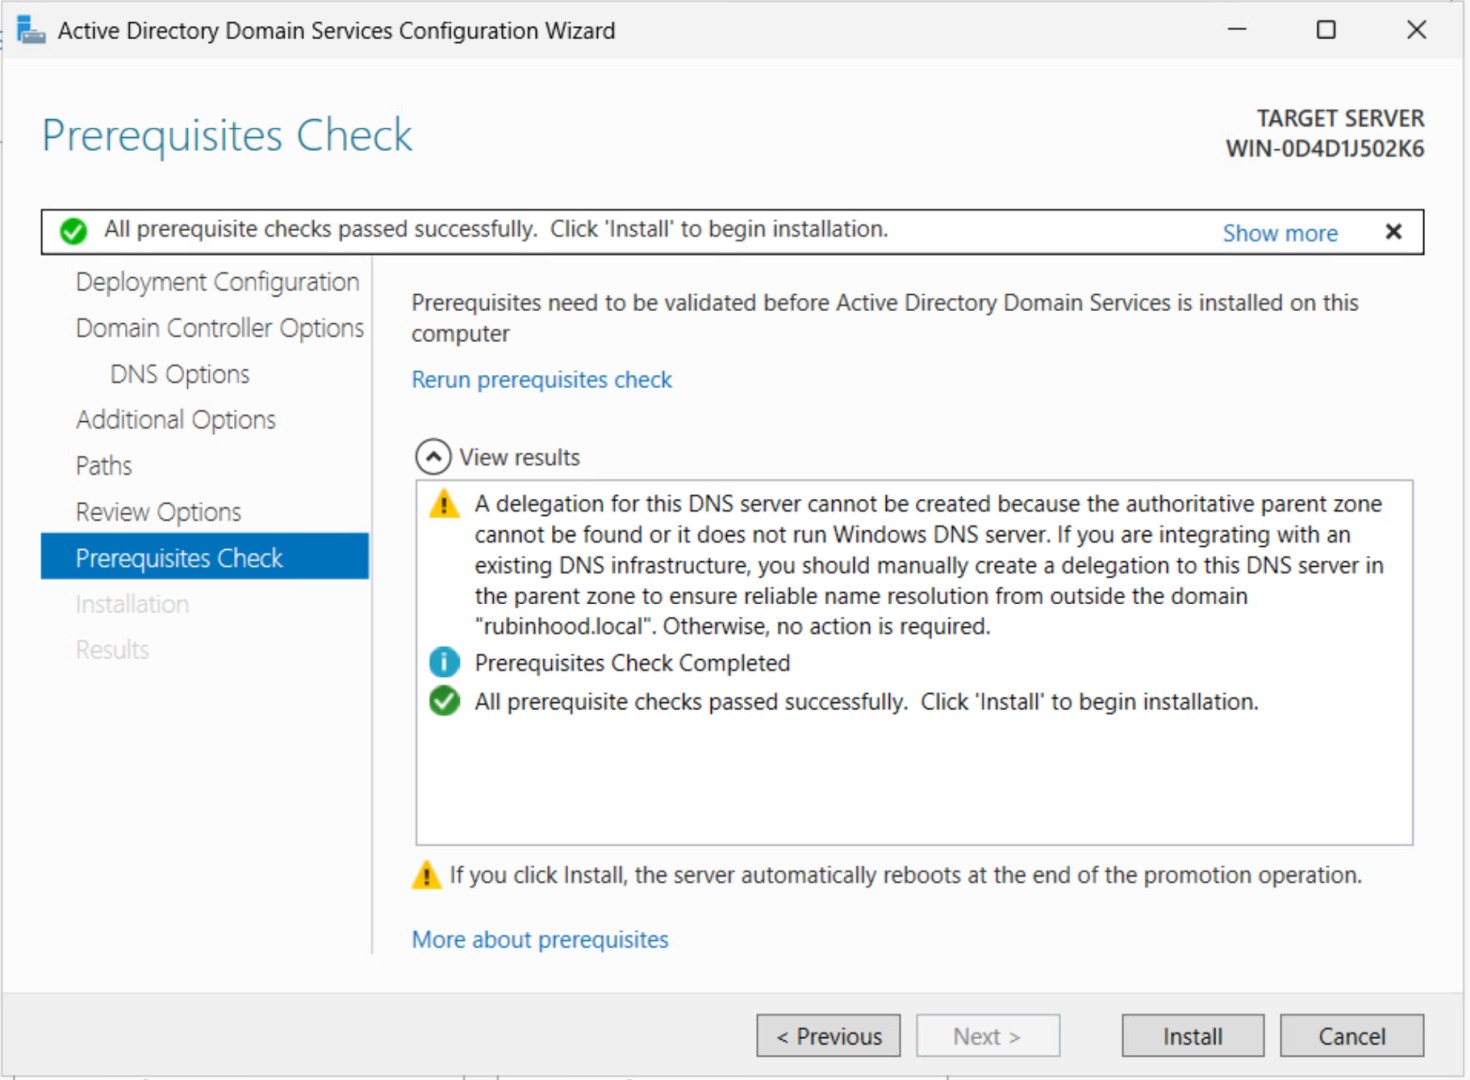
If you see a warning about DNS delegation, you can ignore it unless you need external name resolution.
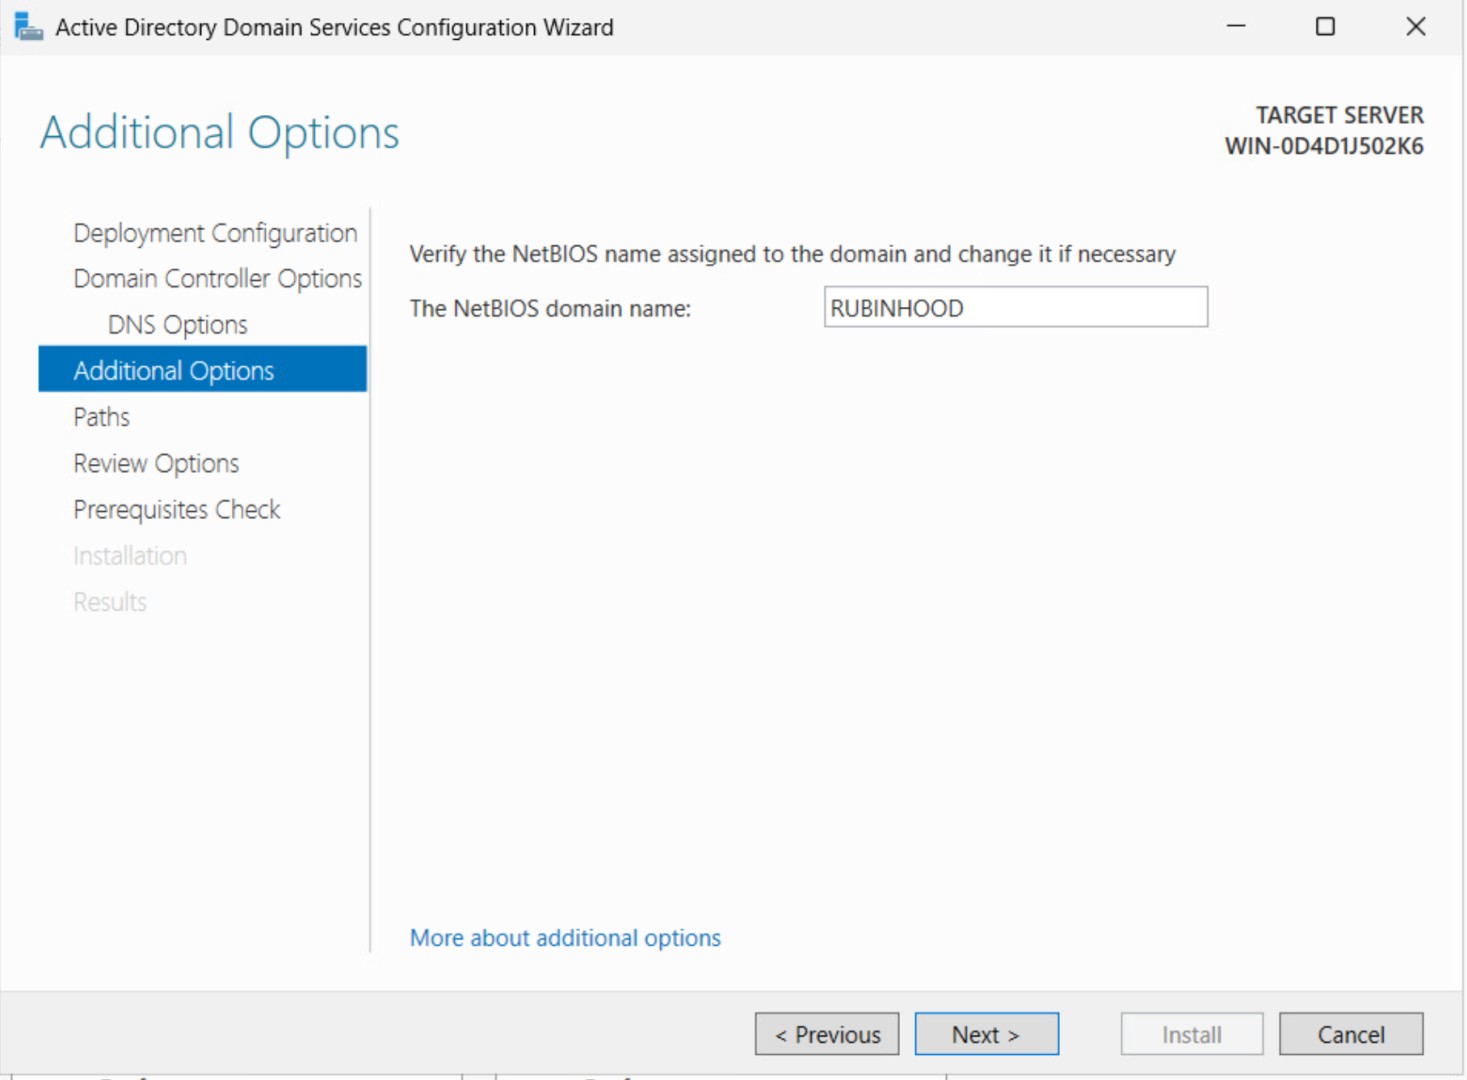
Step 5: Set NetBIOS Name
The system will suggest a NetBIOS name (e.g., RUBINHOOD). You can change it if necessary.
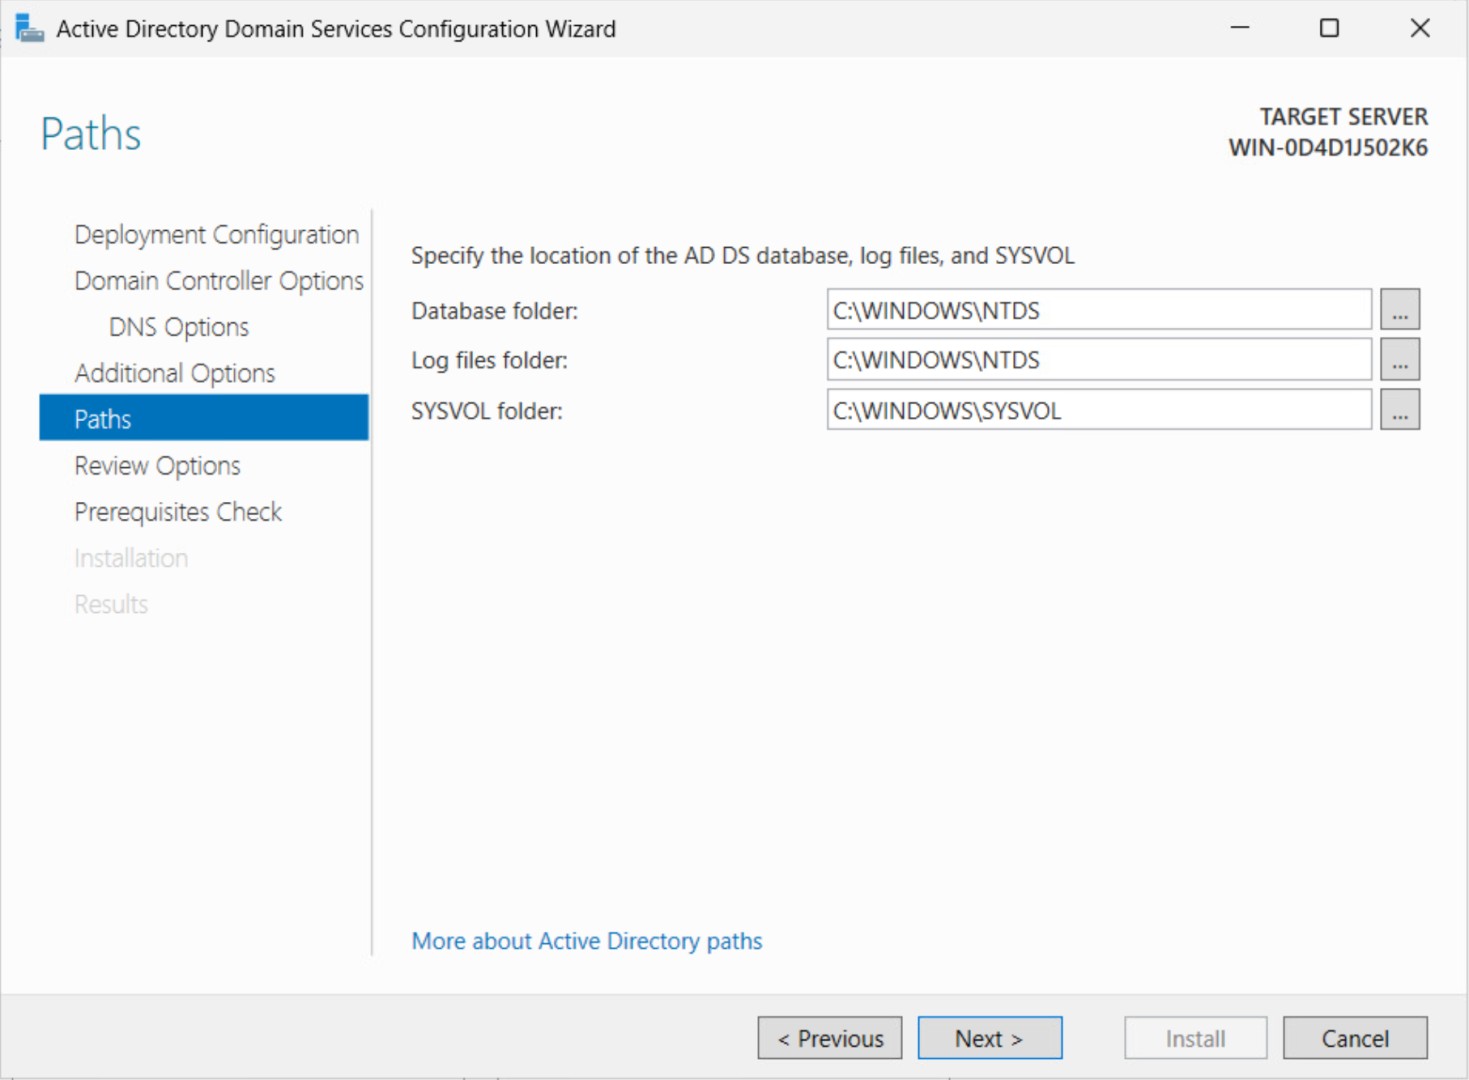
Step 6: Specify AD DS Paths
You can leave the default paths for the NTDS database, log files, and SYSVOL.
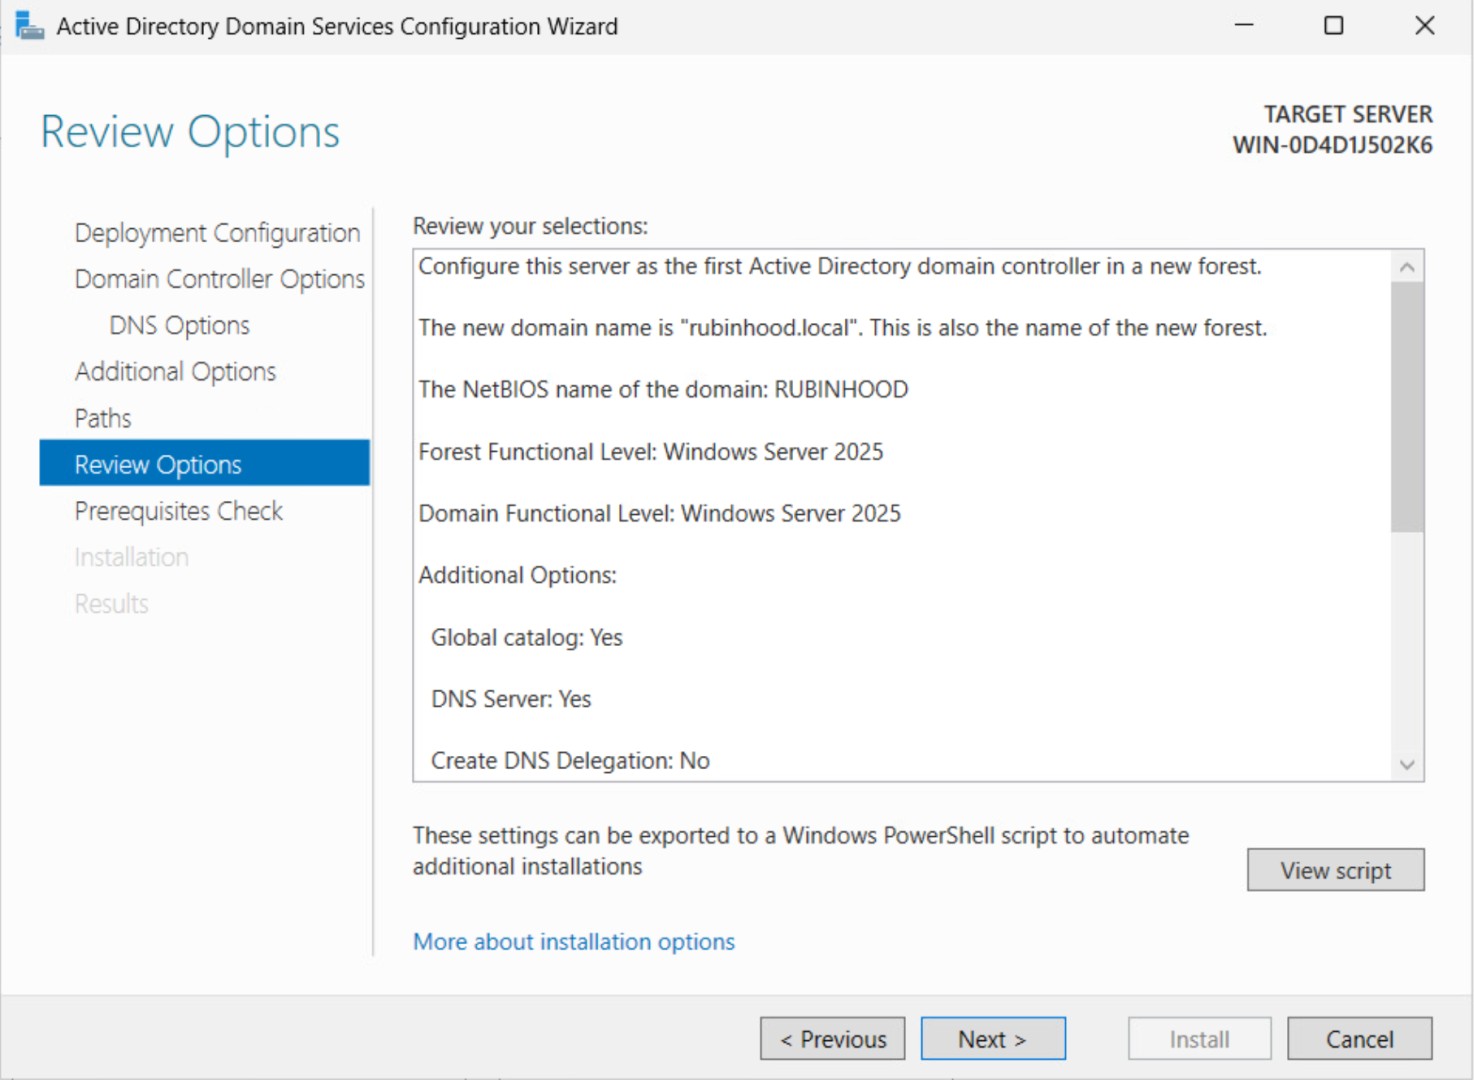
Step 7: Review Configuration
Check all settings. If everything looks good, proceed.
Step 8: Prerequisites Check
The system will check prerequisites. If everything passes, click Install.
Step 9: Server Reboot
The server will restart to apply the changes.

Step 10: Log in to the New Domain
After reboot, log in with your Administrator account to the newly created domain.

Congrats! Your Windows Server is now a Domain Controller.