


Active Directory (AD): Setting Up a Domain and Connecting a Client

Introduction
This tutorial provides a step-by-step guide to setting up an Active Directory environment and connecting a Windows 10 client to the domain.
By following these steps, you will:
Create an Organizational Unit (OU) and a user account
Configure network settings on a client machine
Join a Windows 10 client to the domain
Log in with a domain user account
Each step is illustrated with screenshots to guide you through the process.
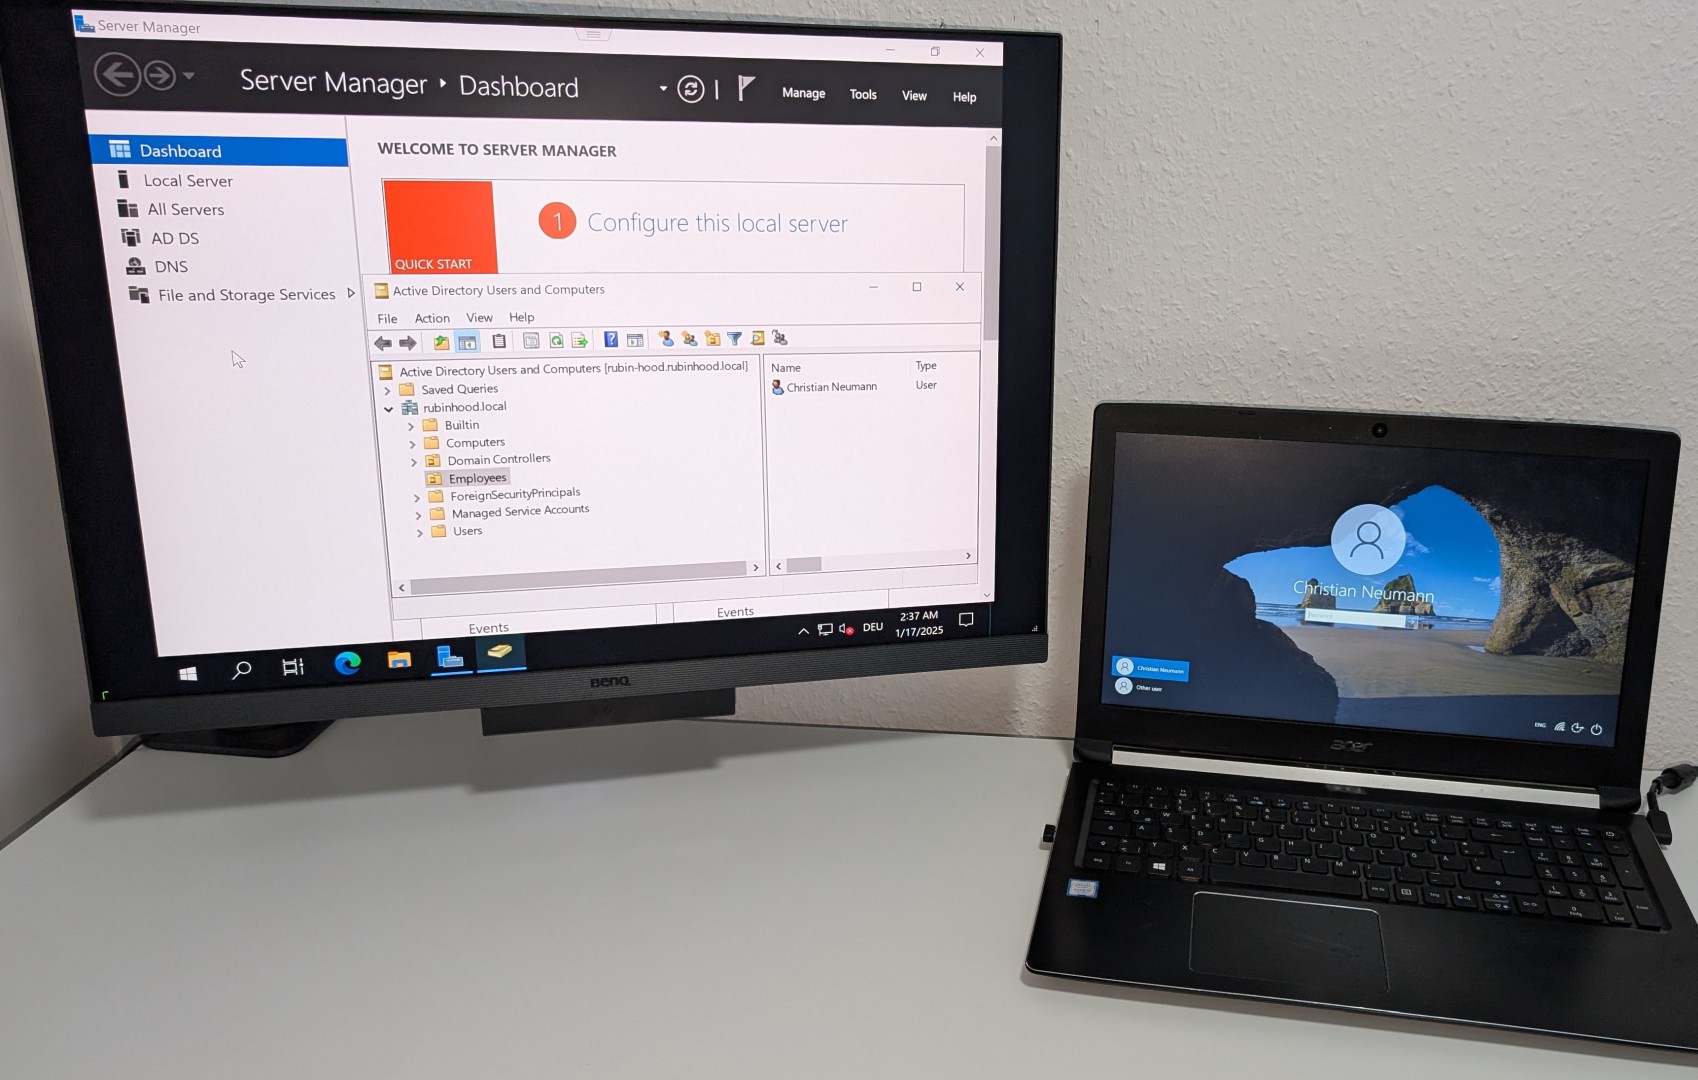
Step 1: Open Active Directory Users and Computers
Click on Tools in the top right menu and select Active Directory Users and Computers from the dropdown menu.
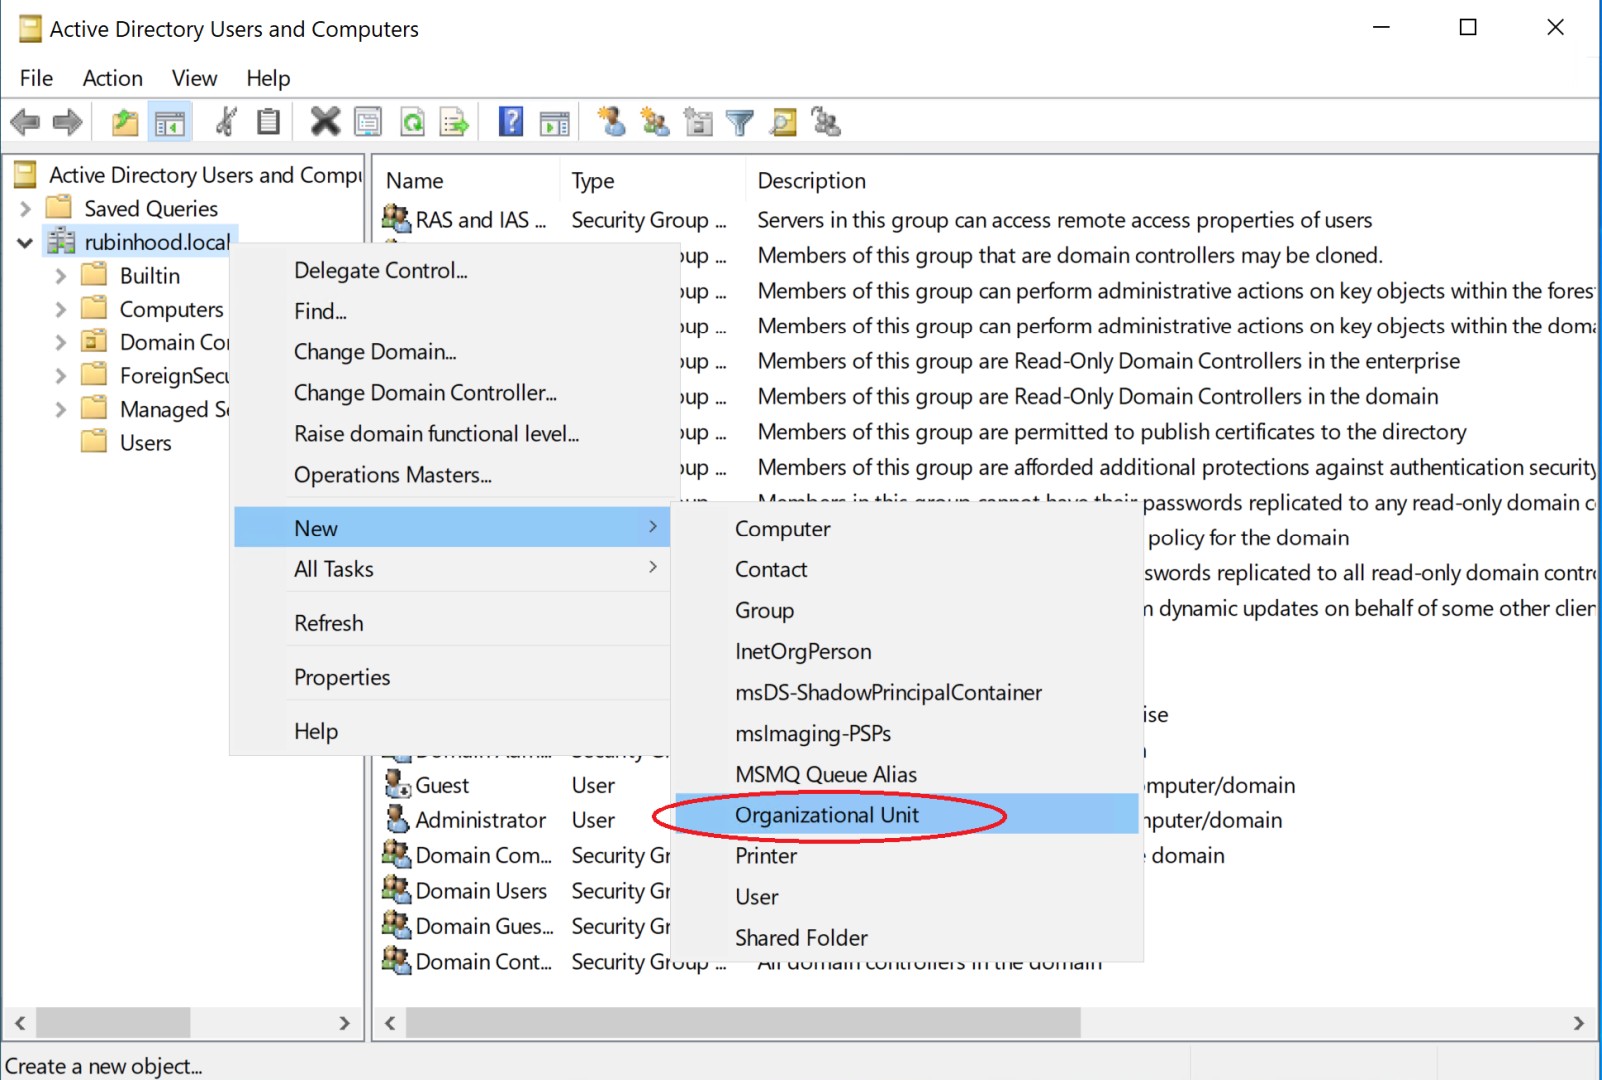
Step 2: Create a New Organizational Unit (OU)
Right-click on your domain, hover over New, and select Organizational Unit.
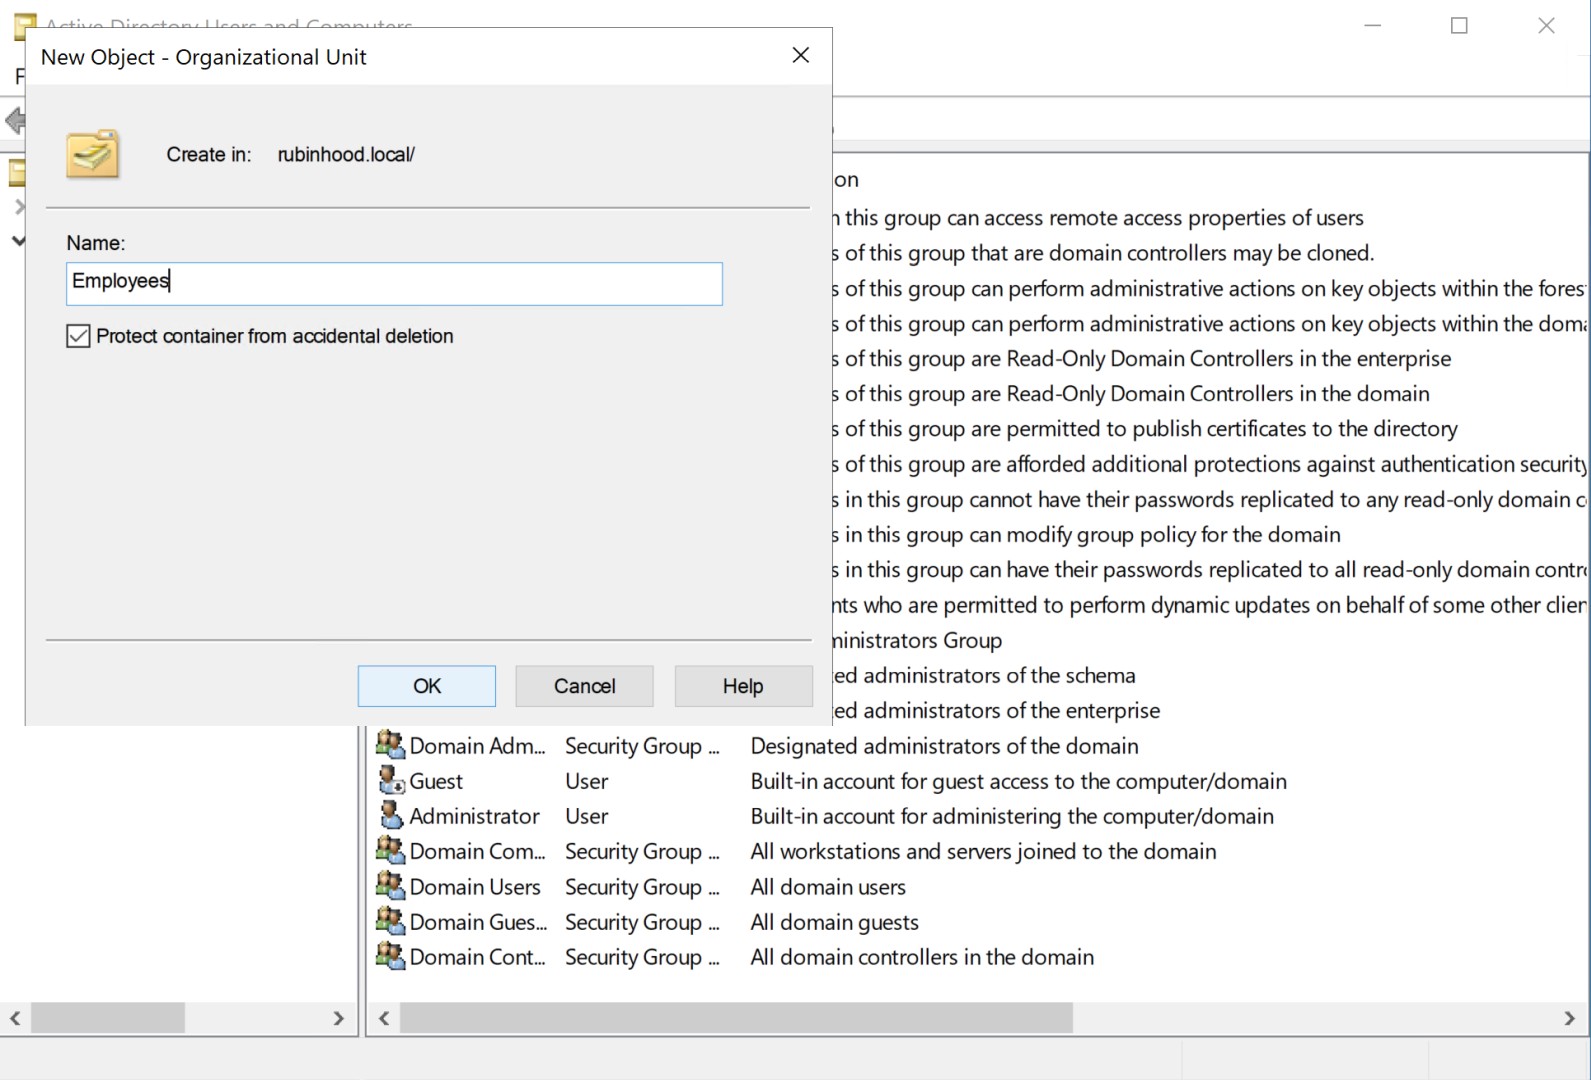
Step 3: Name the Organizational Unit
Enter a name for the new Organizational Unit (e.g., Employees) and ensure Protect container from accidental deletion is checked. Click OK.

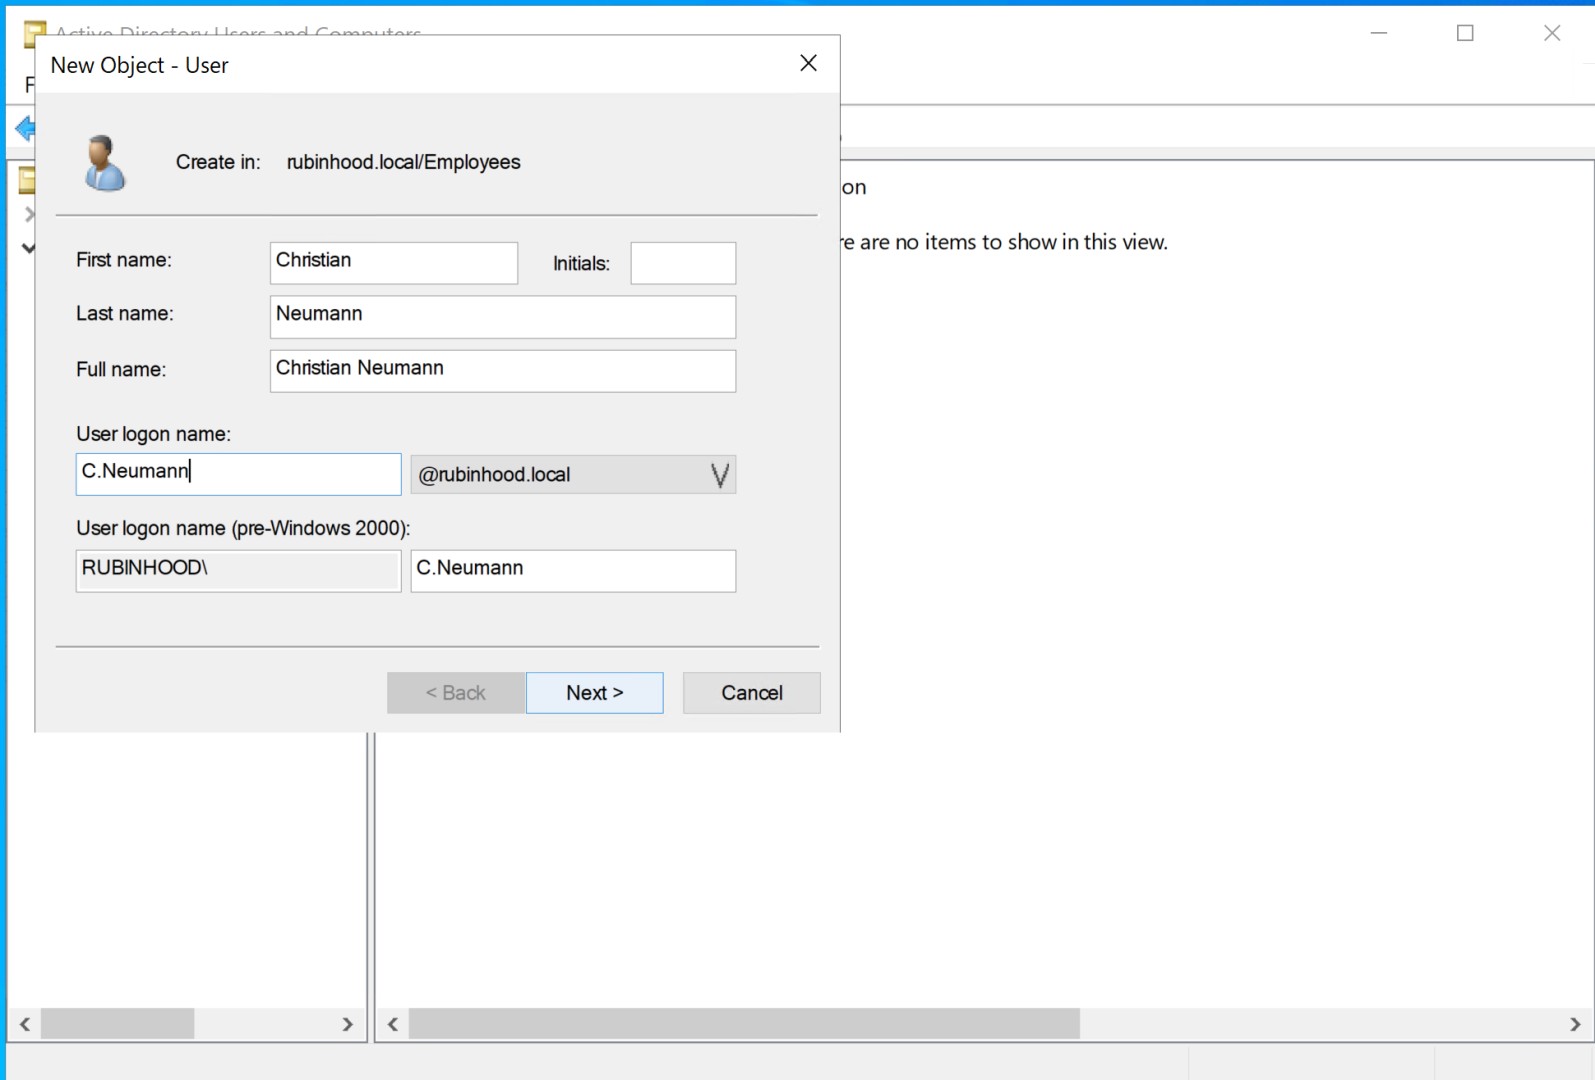
Step 4: Create a New User Account
Right-click on the newly created Employees Organizational Unit, hover over New, and select User.
Step 5: Enter User Details
Fill in the user's first name, last name, and logon name (e.g., C.Neumann). Click Next.
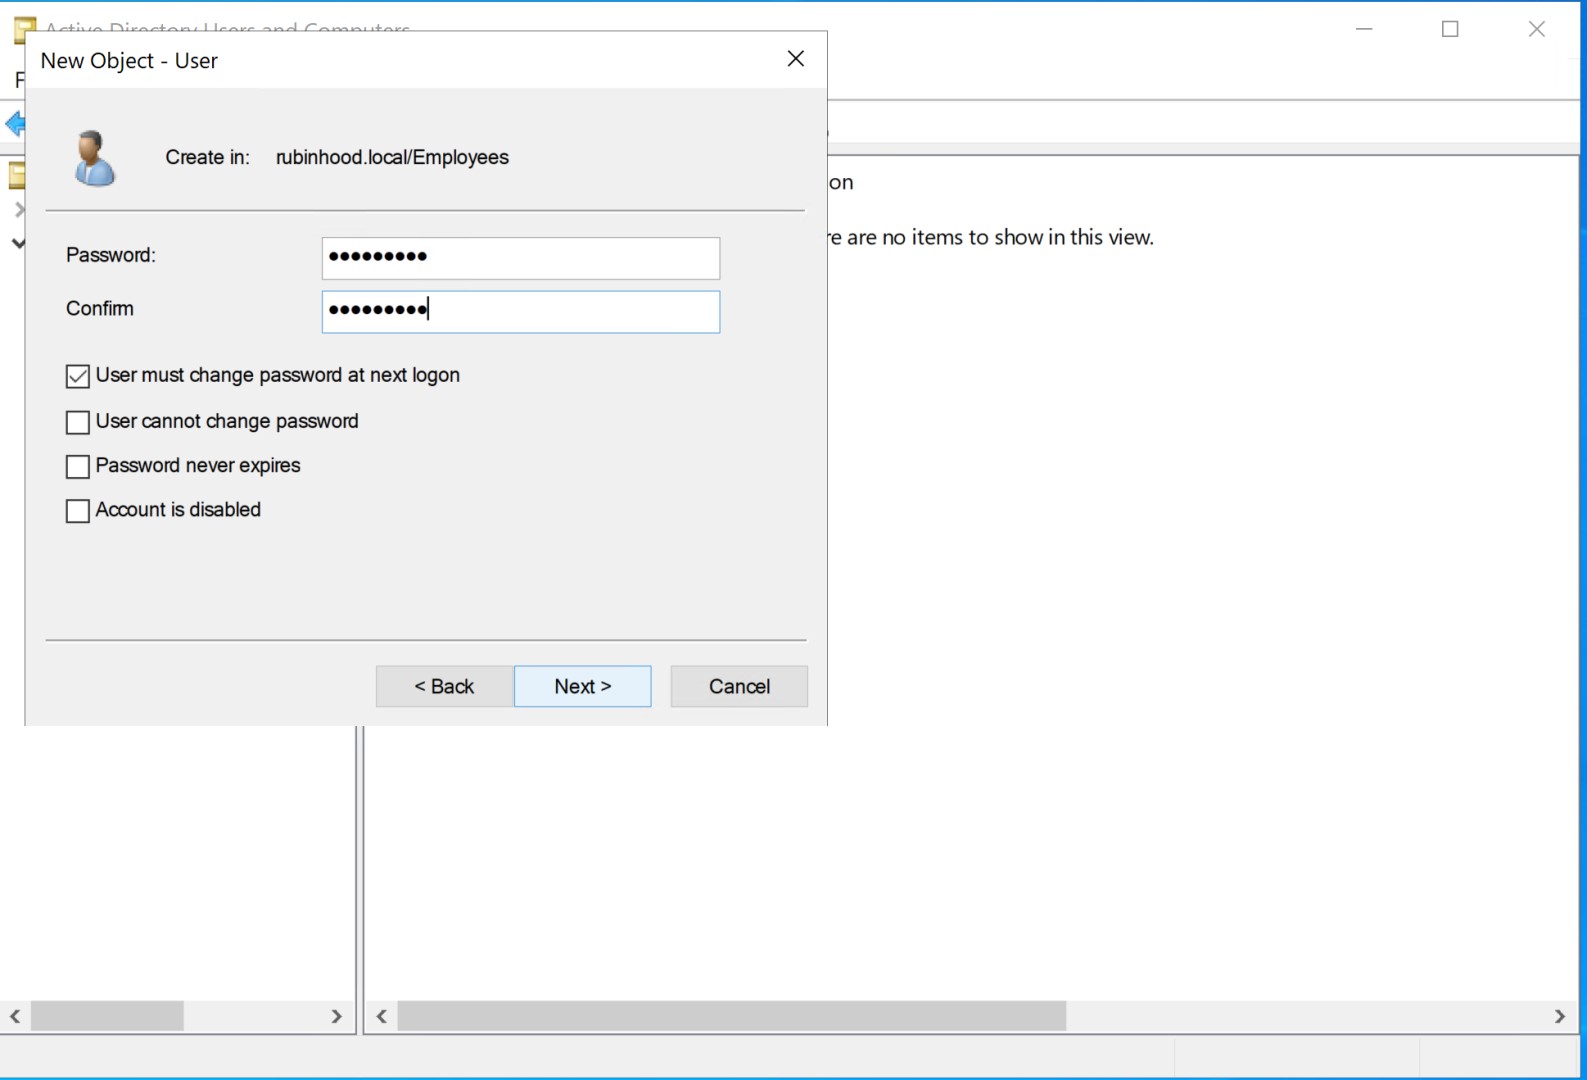
Step 6: Set a Password
Enter a password for the new user. Ensure that User must change password at next logon is checked. Click Next.
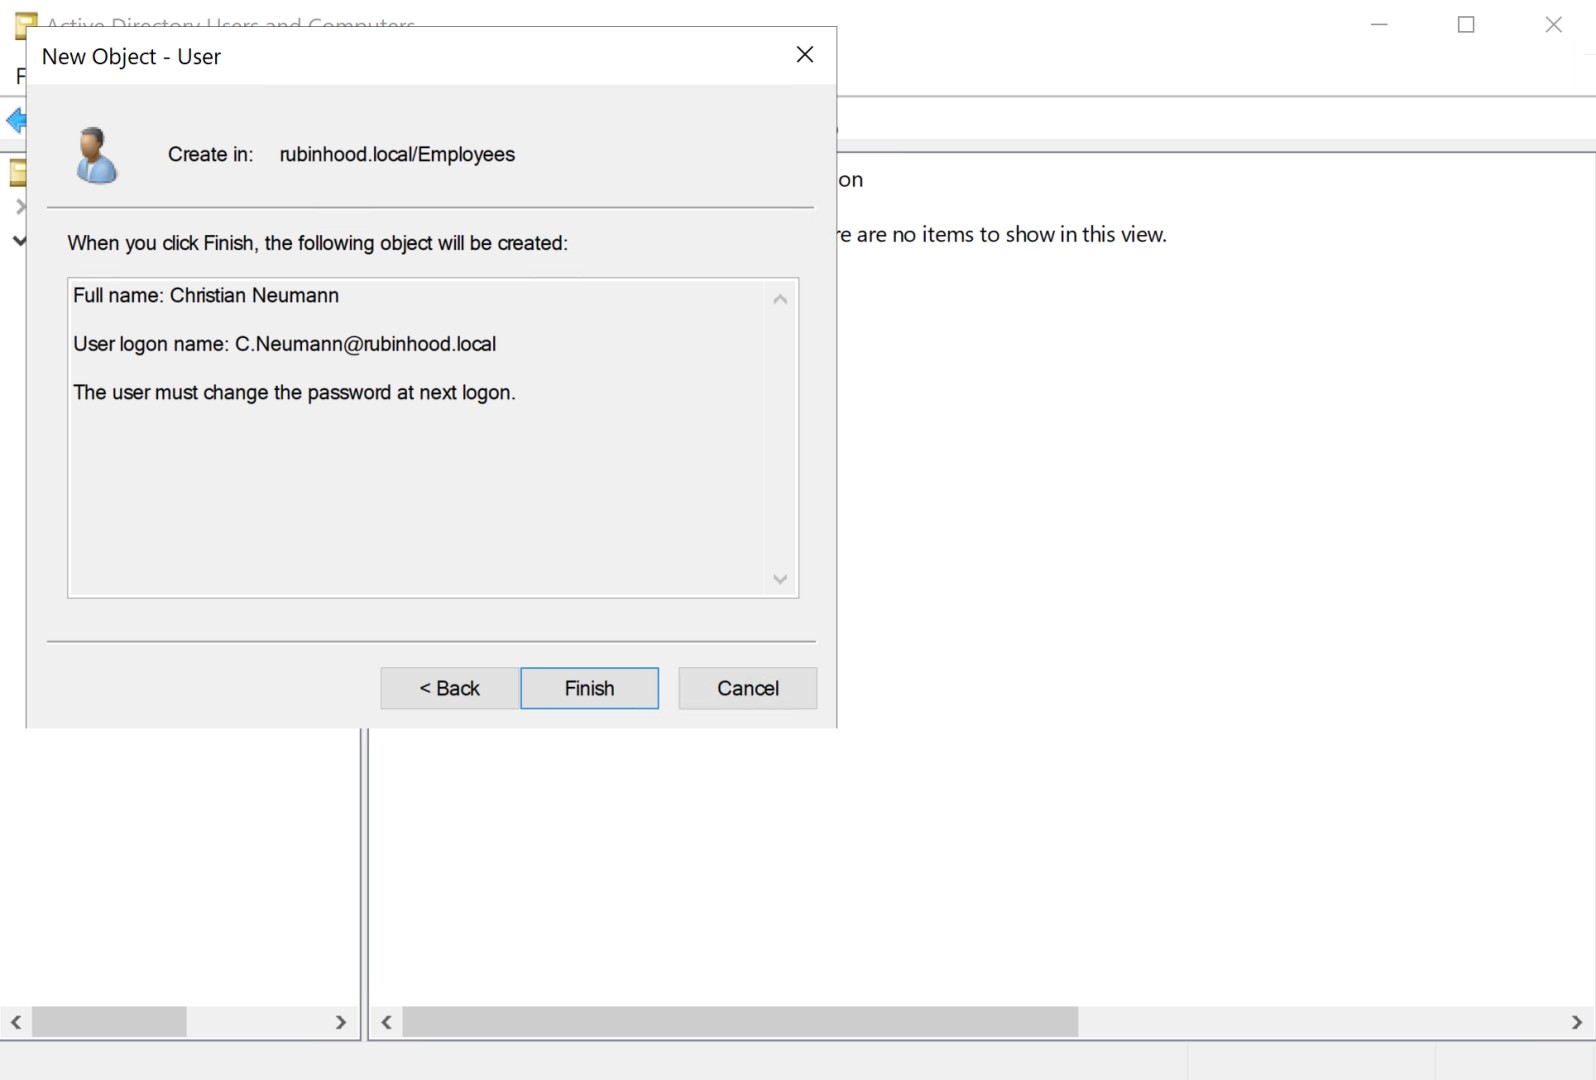
Step 7: Confirm User Creation
Review the user details and click Finish to create the account.
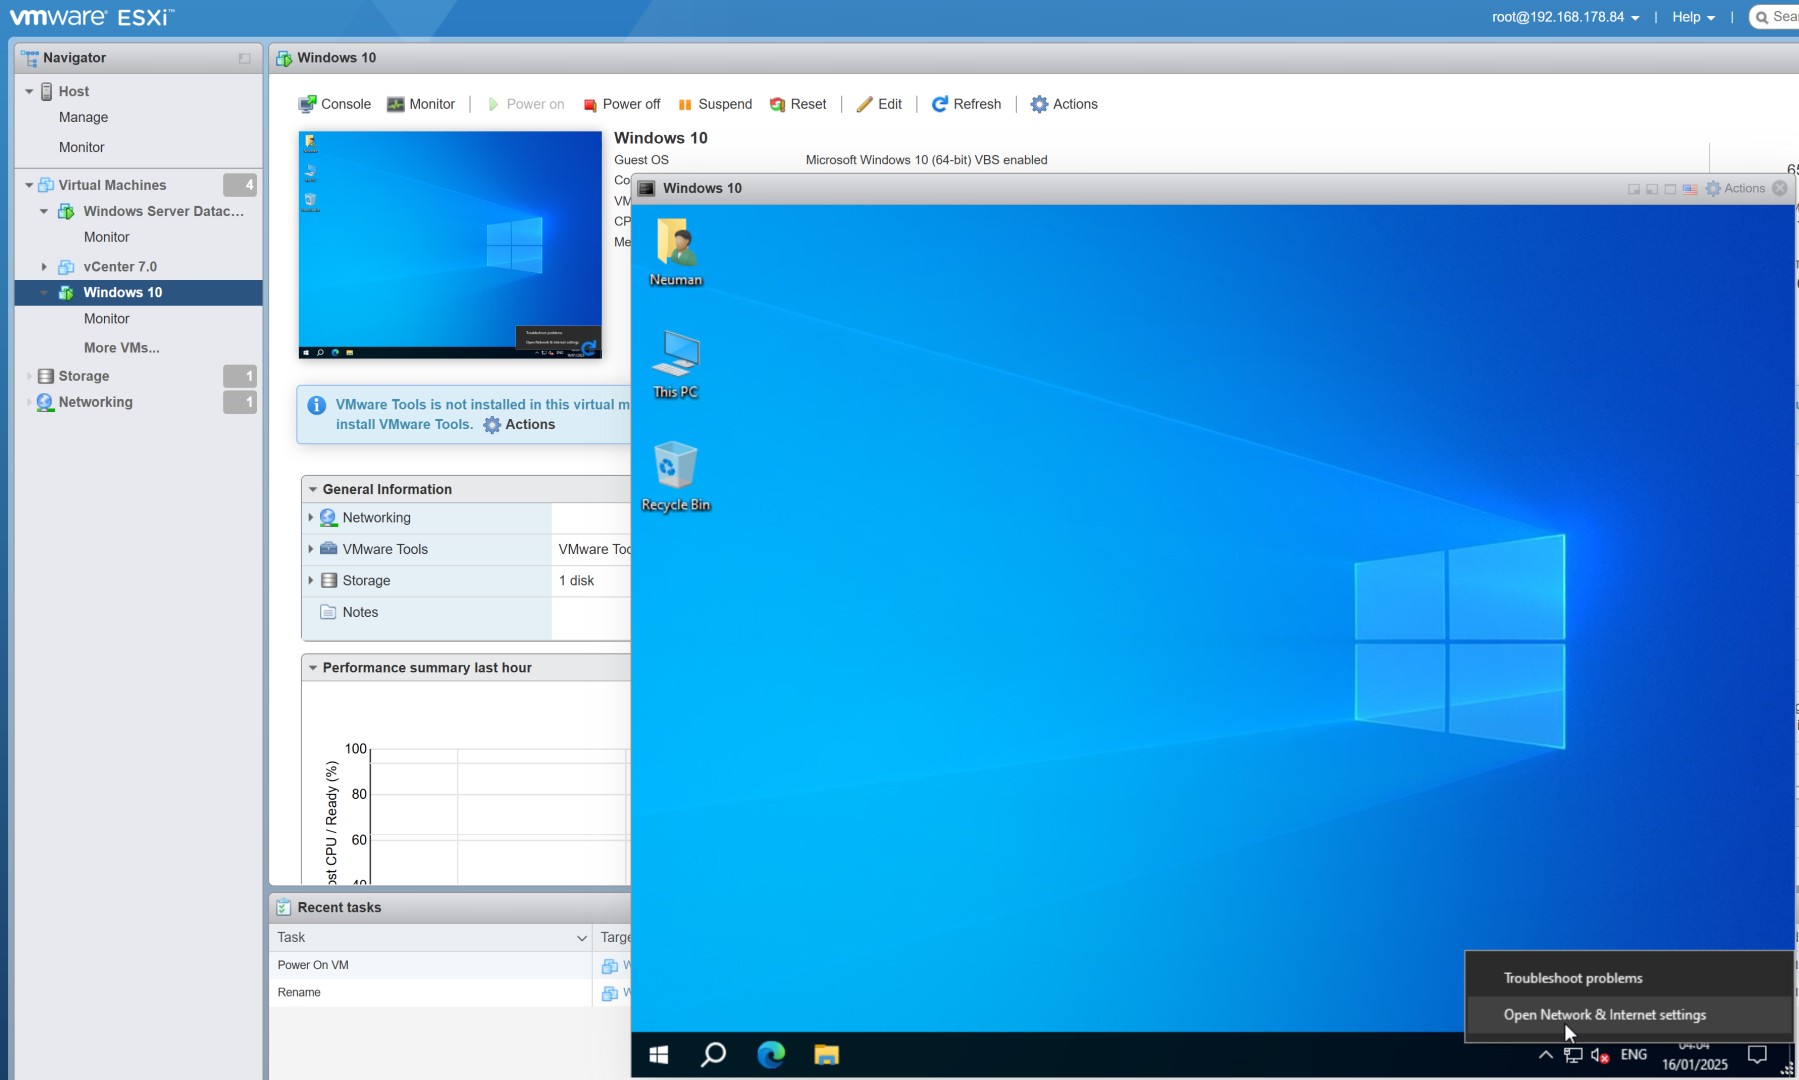
Step 8: Open Network Settings on Windows 10 Client
Go to the Windows 10 Client and open Network & Internet settings by clicking on the network icon in the taskbar.
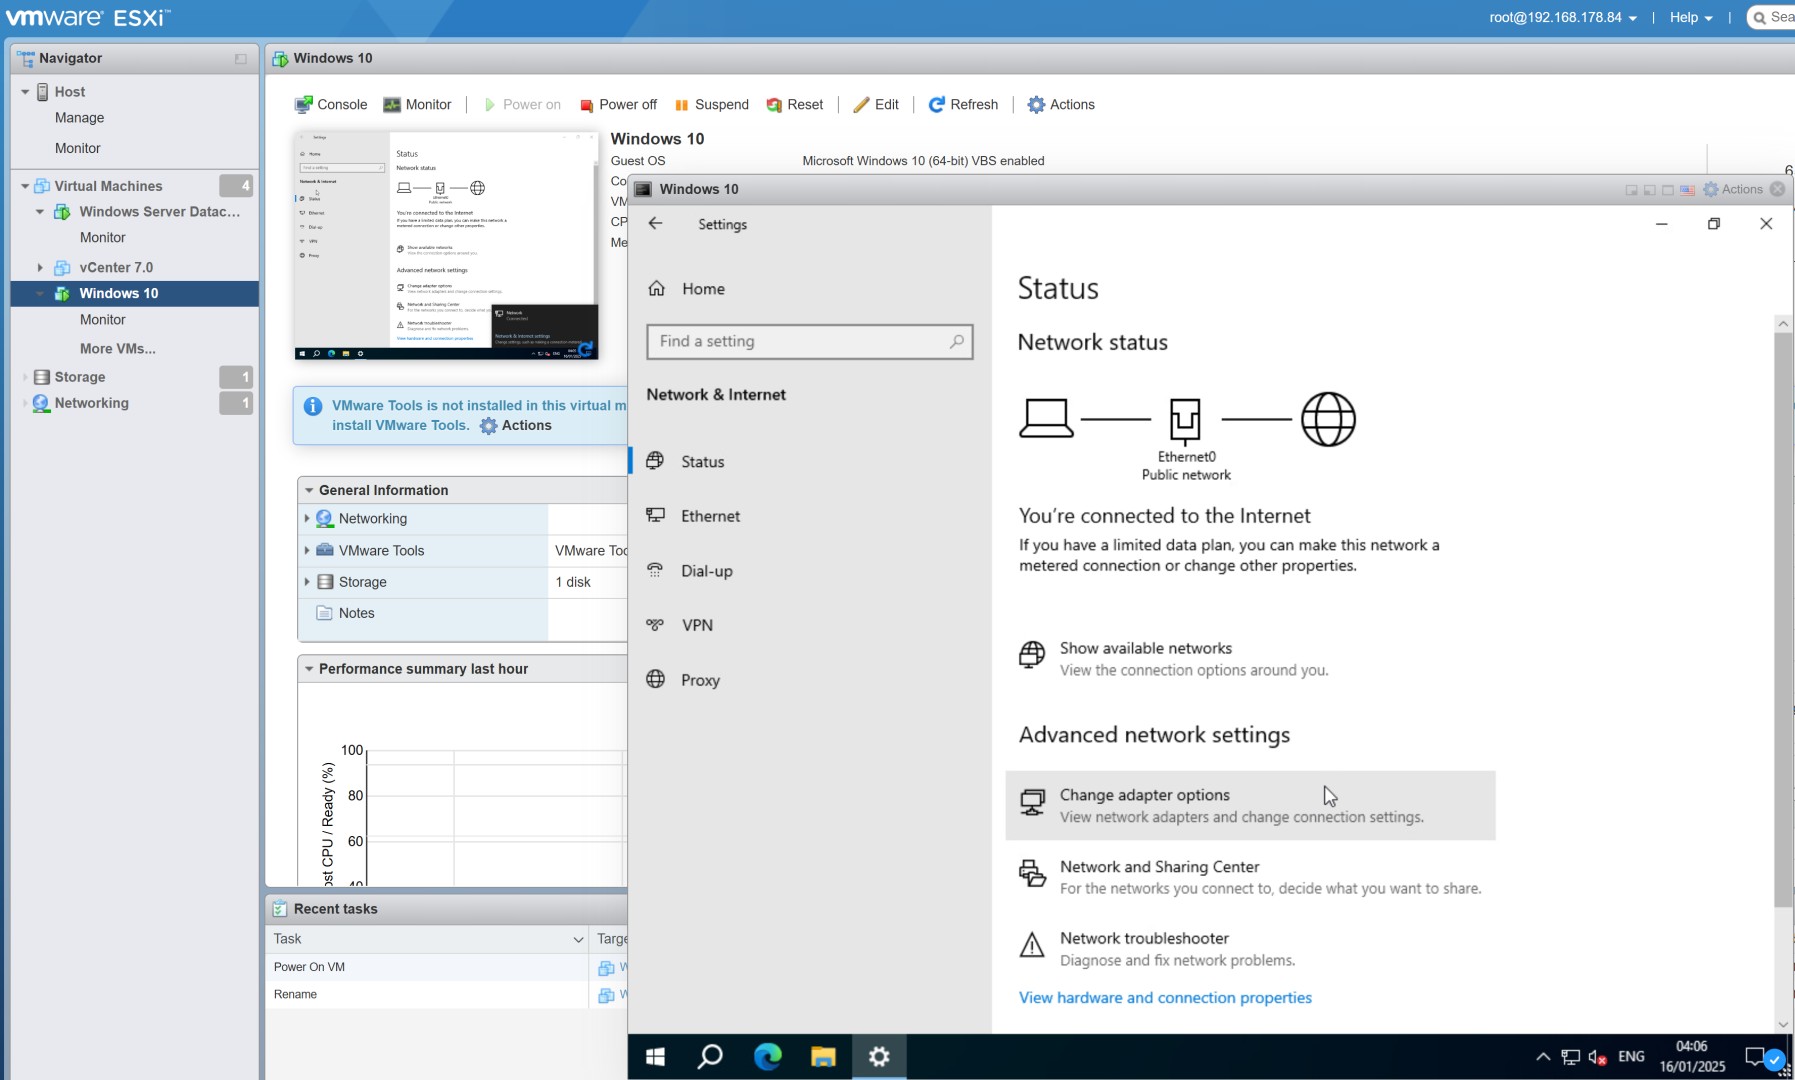
Step 9: Open Advanced Network Settings
Click on Change adapter options to configure the network settings.
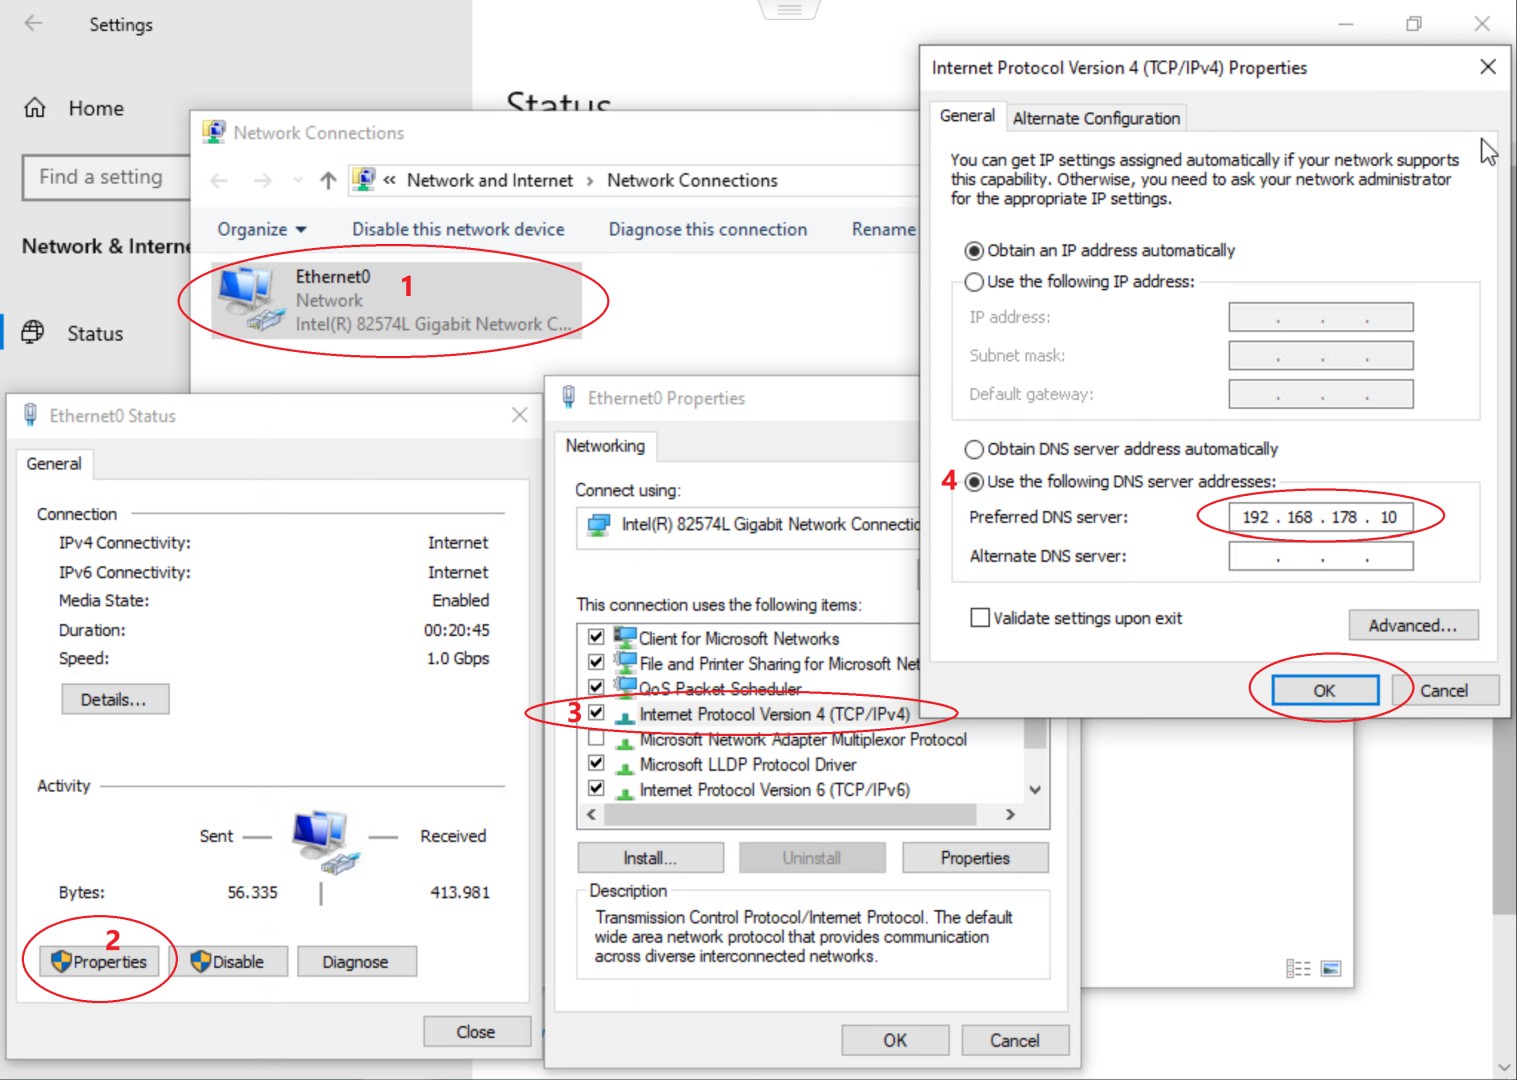
Step 10: Configure Network Adapter
Open the Ethernet properties, select Internet Protocol Version 4 (TCP/IPv4), and set the Preferred DNS Server to the domain controller's IP address (e.g., 192.168.178.10). Click OK.
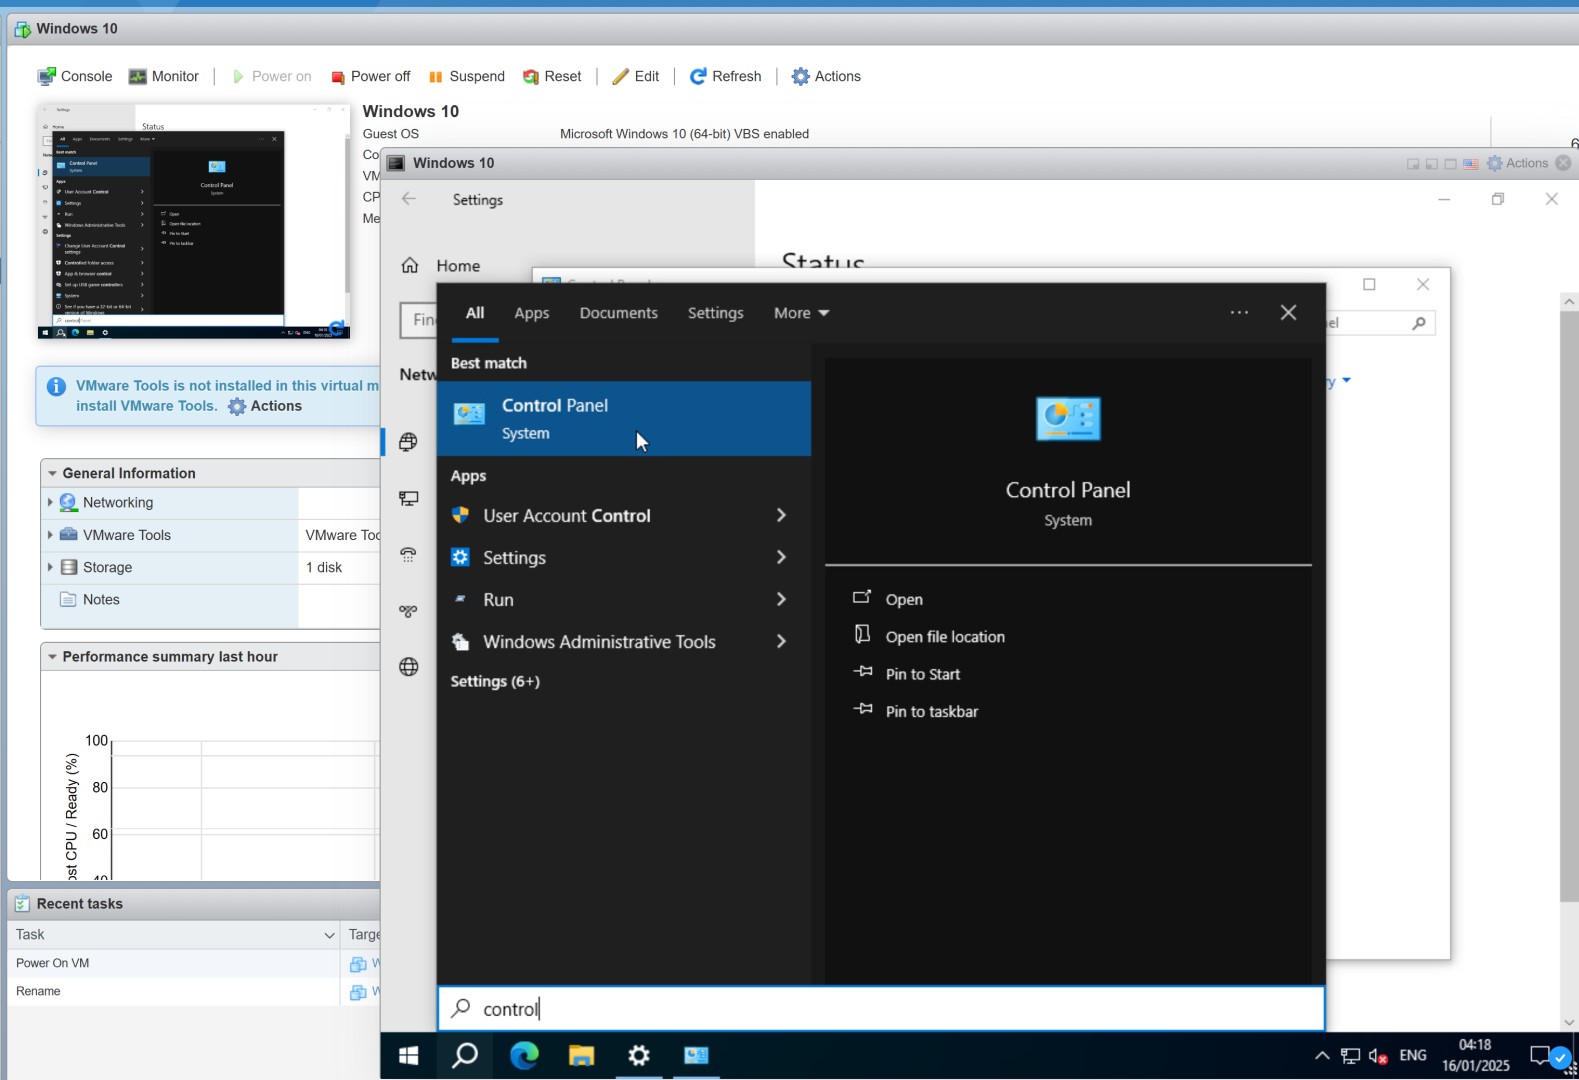
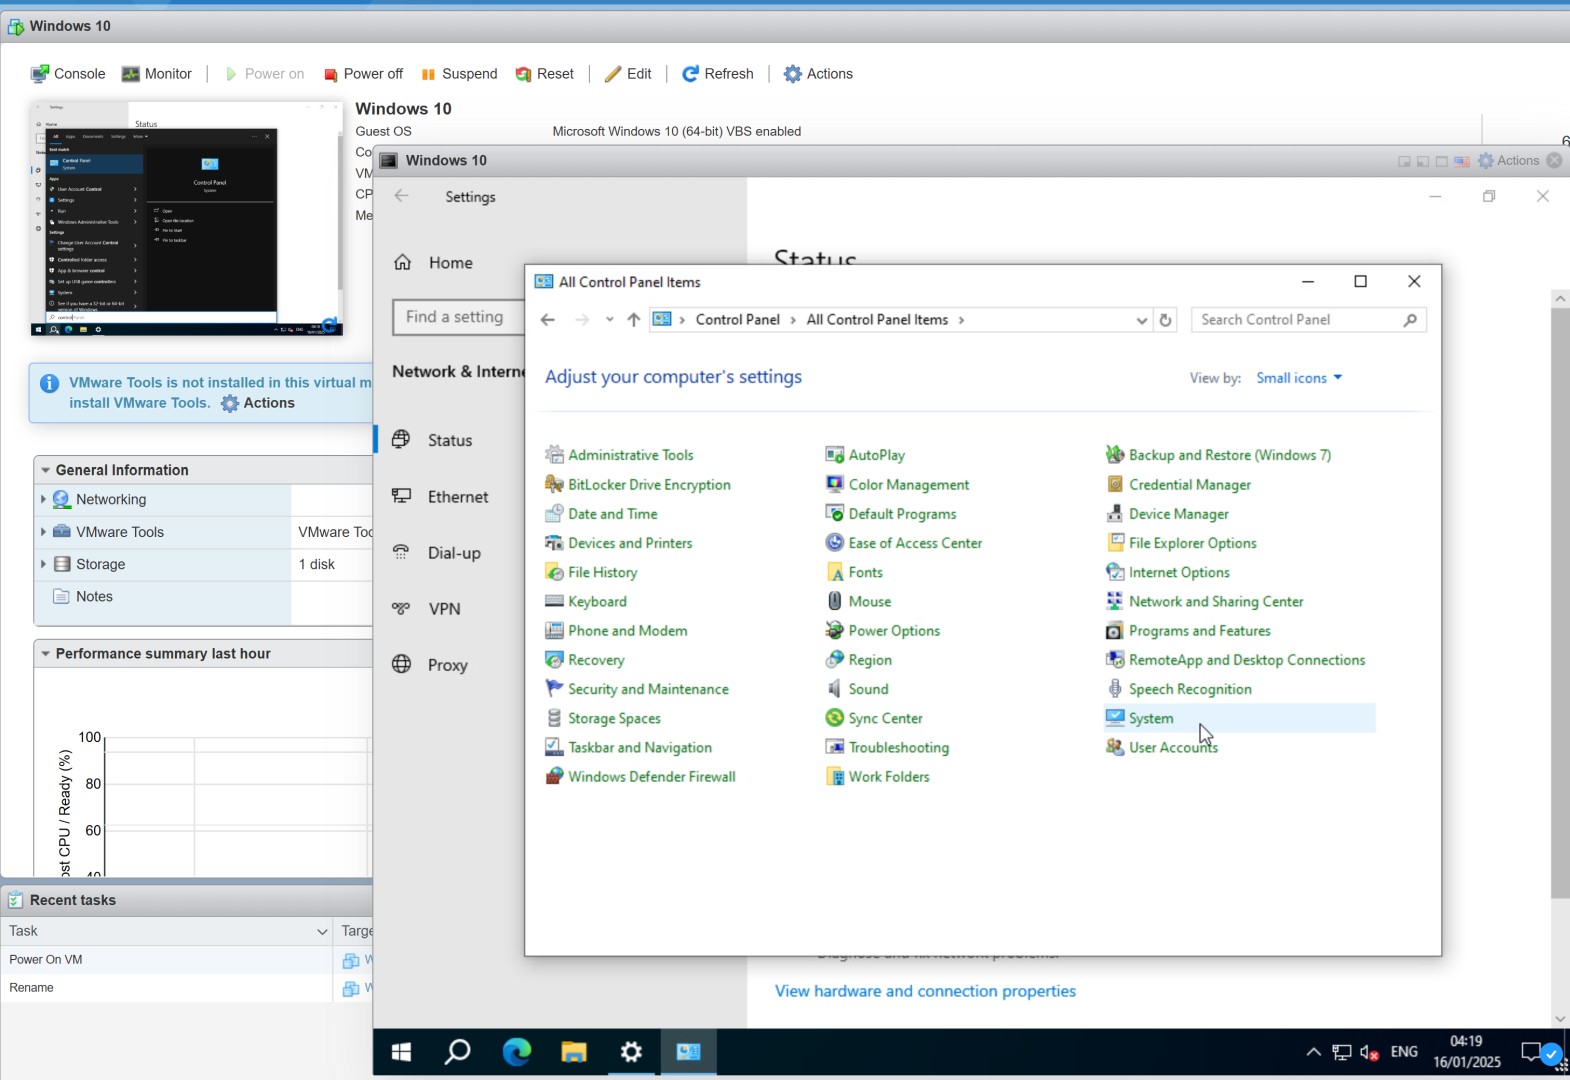
Step 11: Open the Control Panel
Open the Control Panel, switch to Small icons view, and click System.
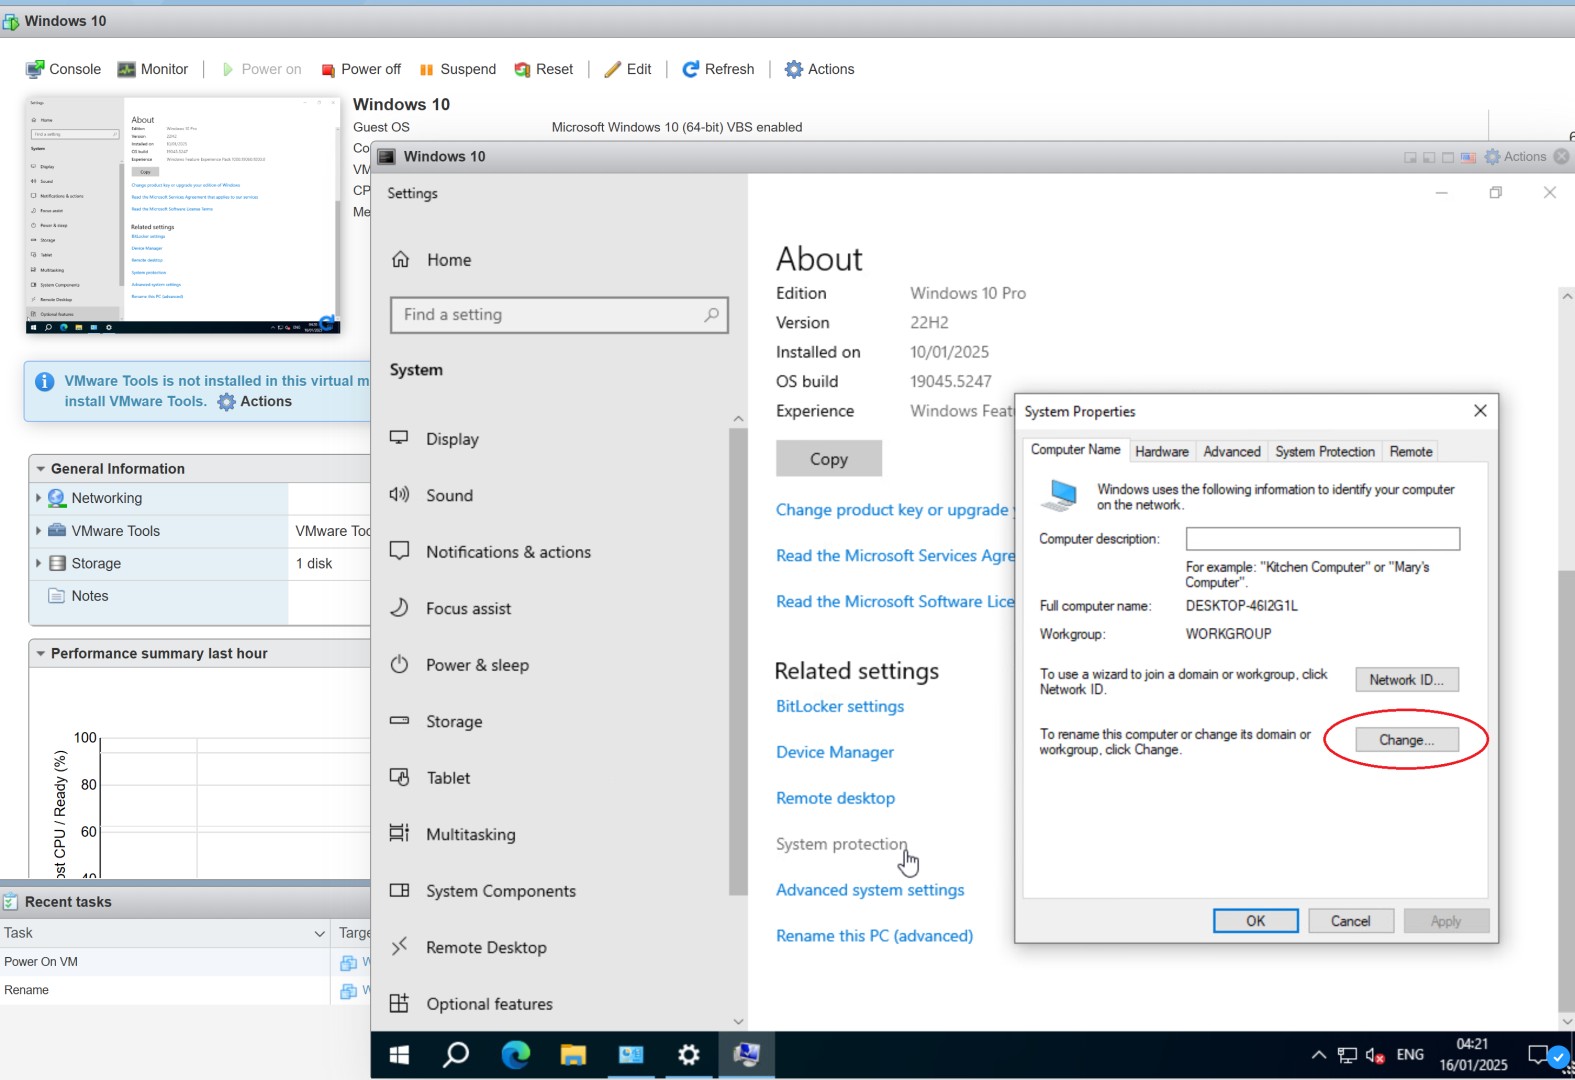
Step 12: Change Computer Settings
In the System Properties window, click Change to rename the computer or join a domain.
Step 13: Join the Domain
Select Domain, enter the domain name (e.g., rubinhood.local), and confirm with OK.
Step 14: Enter Administrator Credentials
Enter the Administrator credentials for the domain and click OK to proceed.
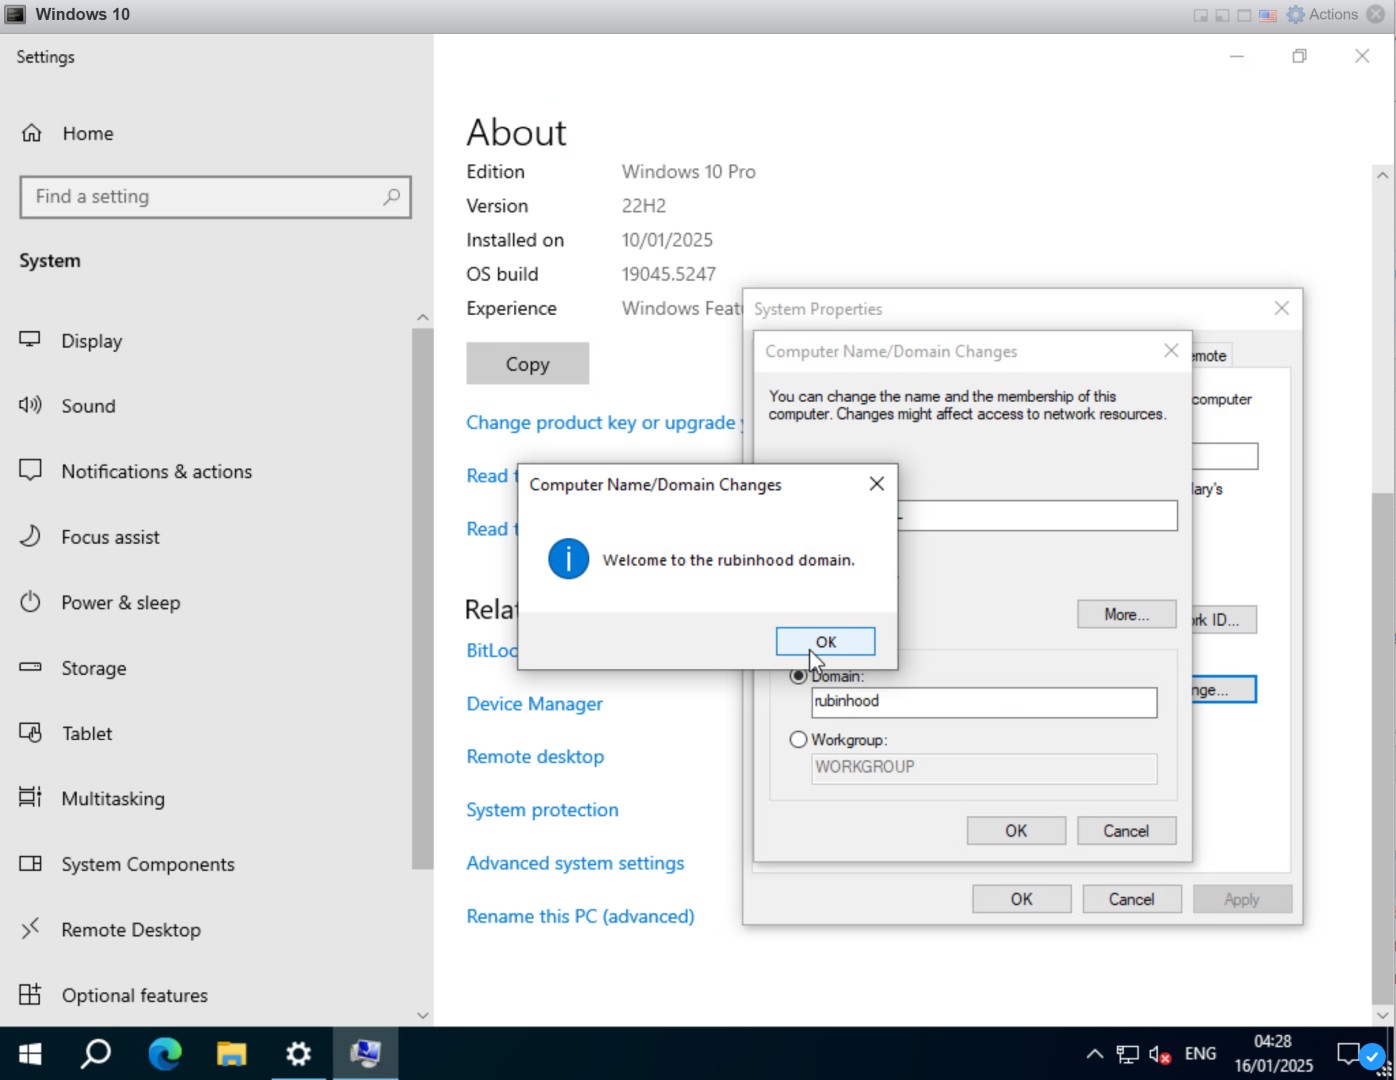
Step 15: Domain Join Confirmation
A message confirms that the computer has successfully joined the domain. Click OK.

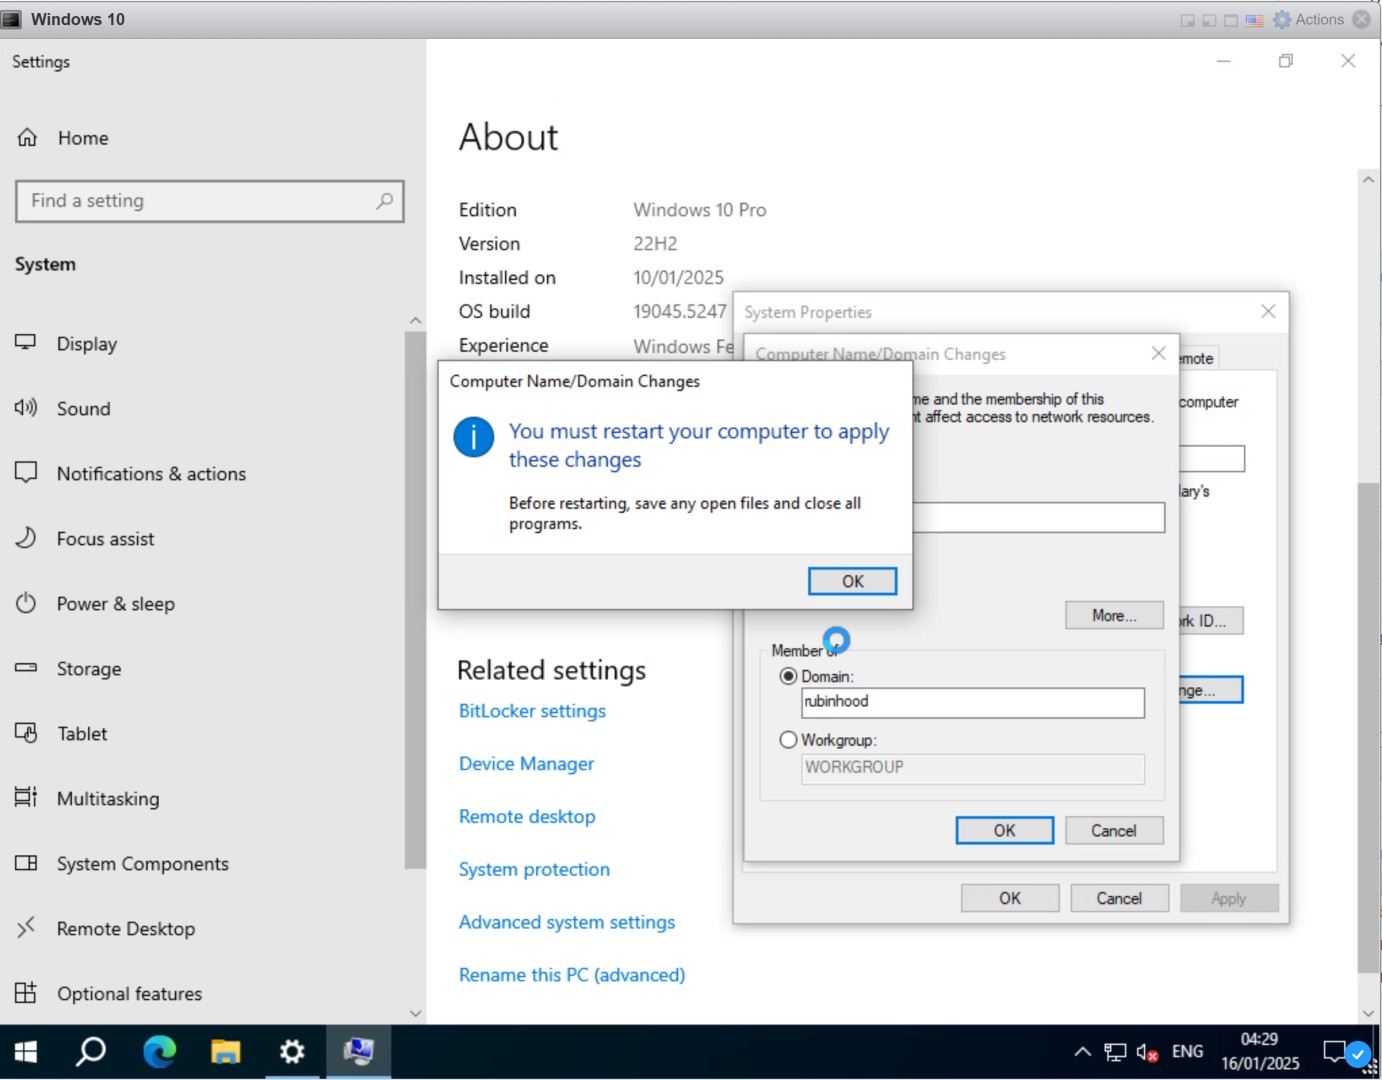
Step 16: Restart the Computer
A prompt appears requiring a restart. Click OK, then restart the system.
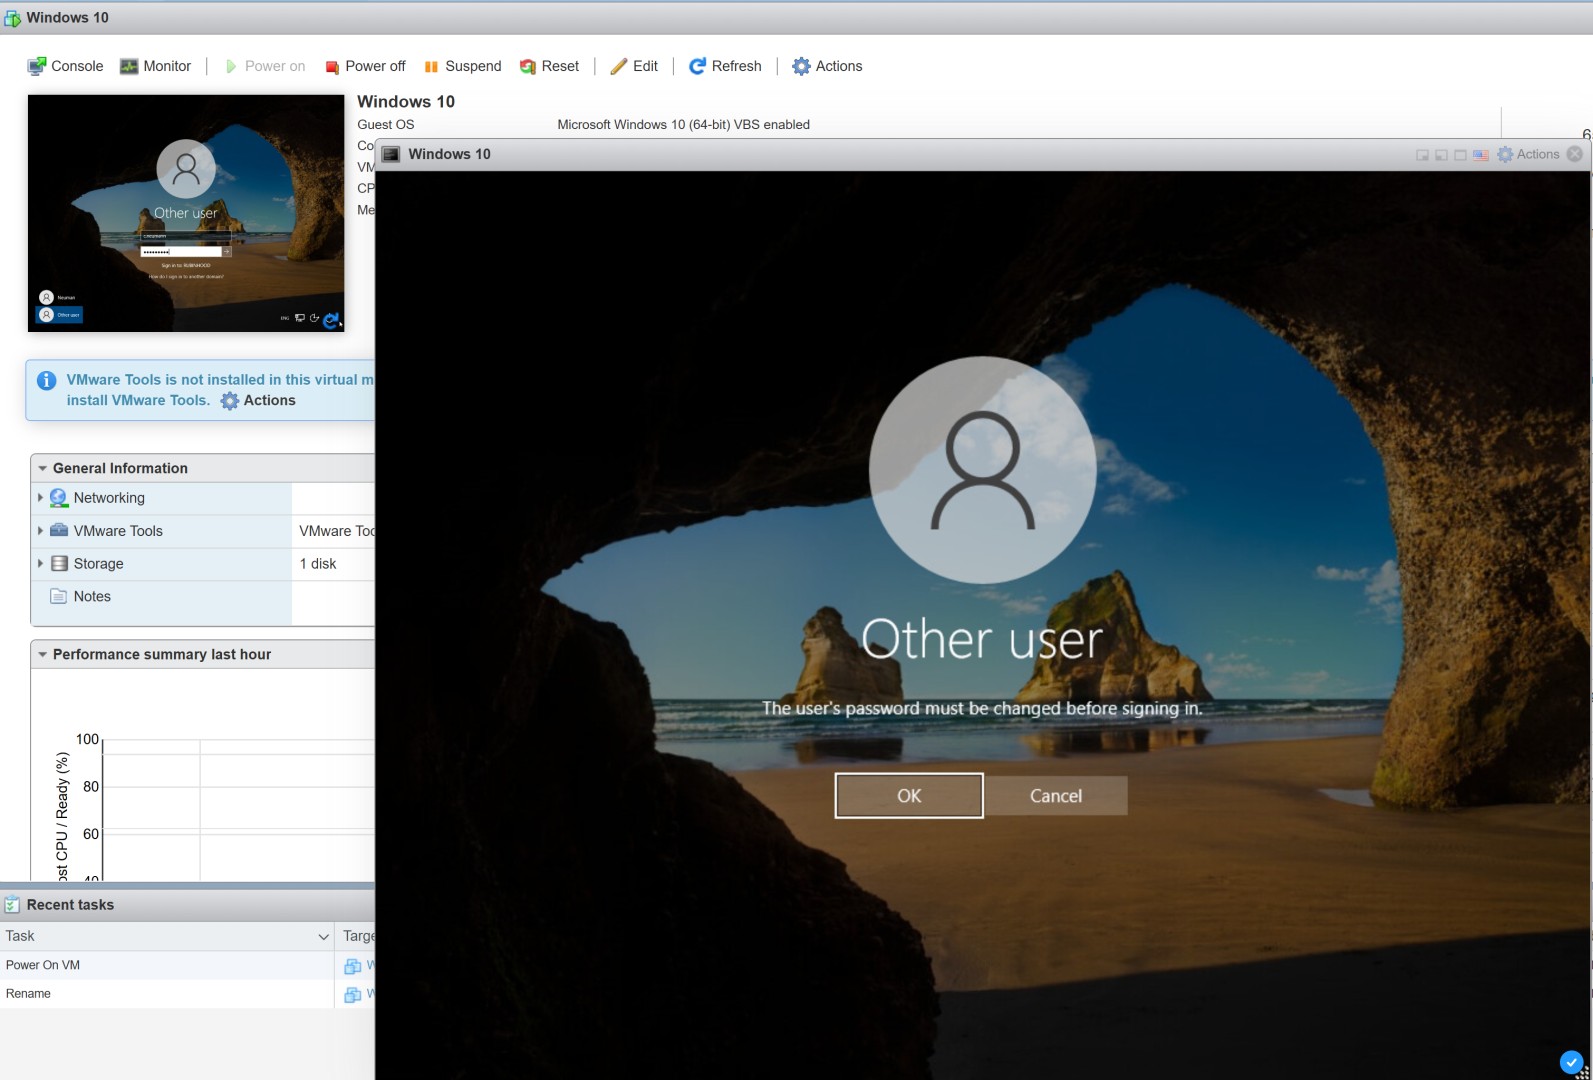
Step 17: Login with Domain Credentials
At the login screen, select Other user and enter the domain user credentials (e.g., c.neumann).
Step 18: Password Change Prompt
Since the account was set to change the password on first login, a prompt appears. Click OK.

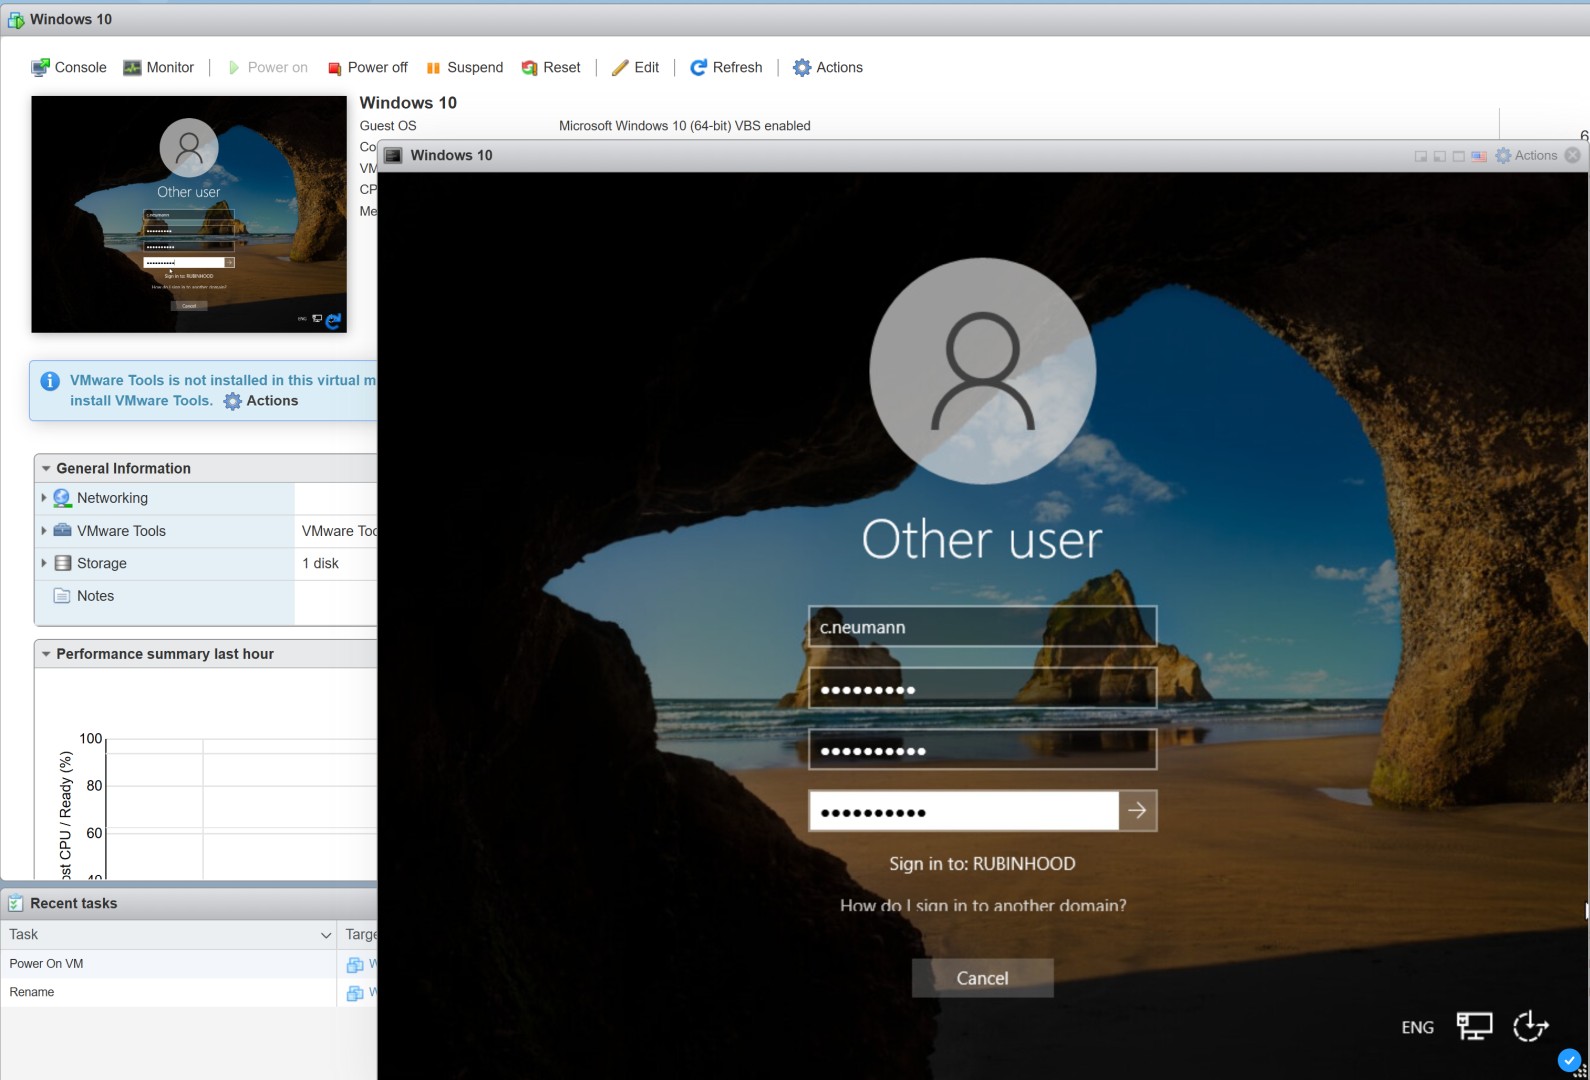
Step 19: Enter New Password
Enter a new password, confirm it, and click Enter to proceed.
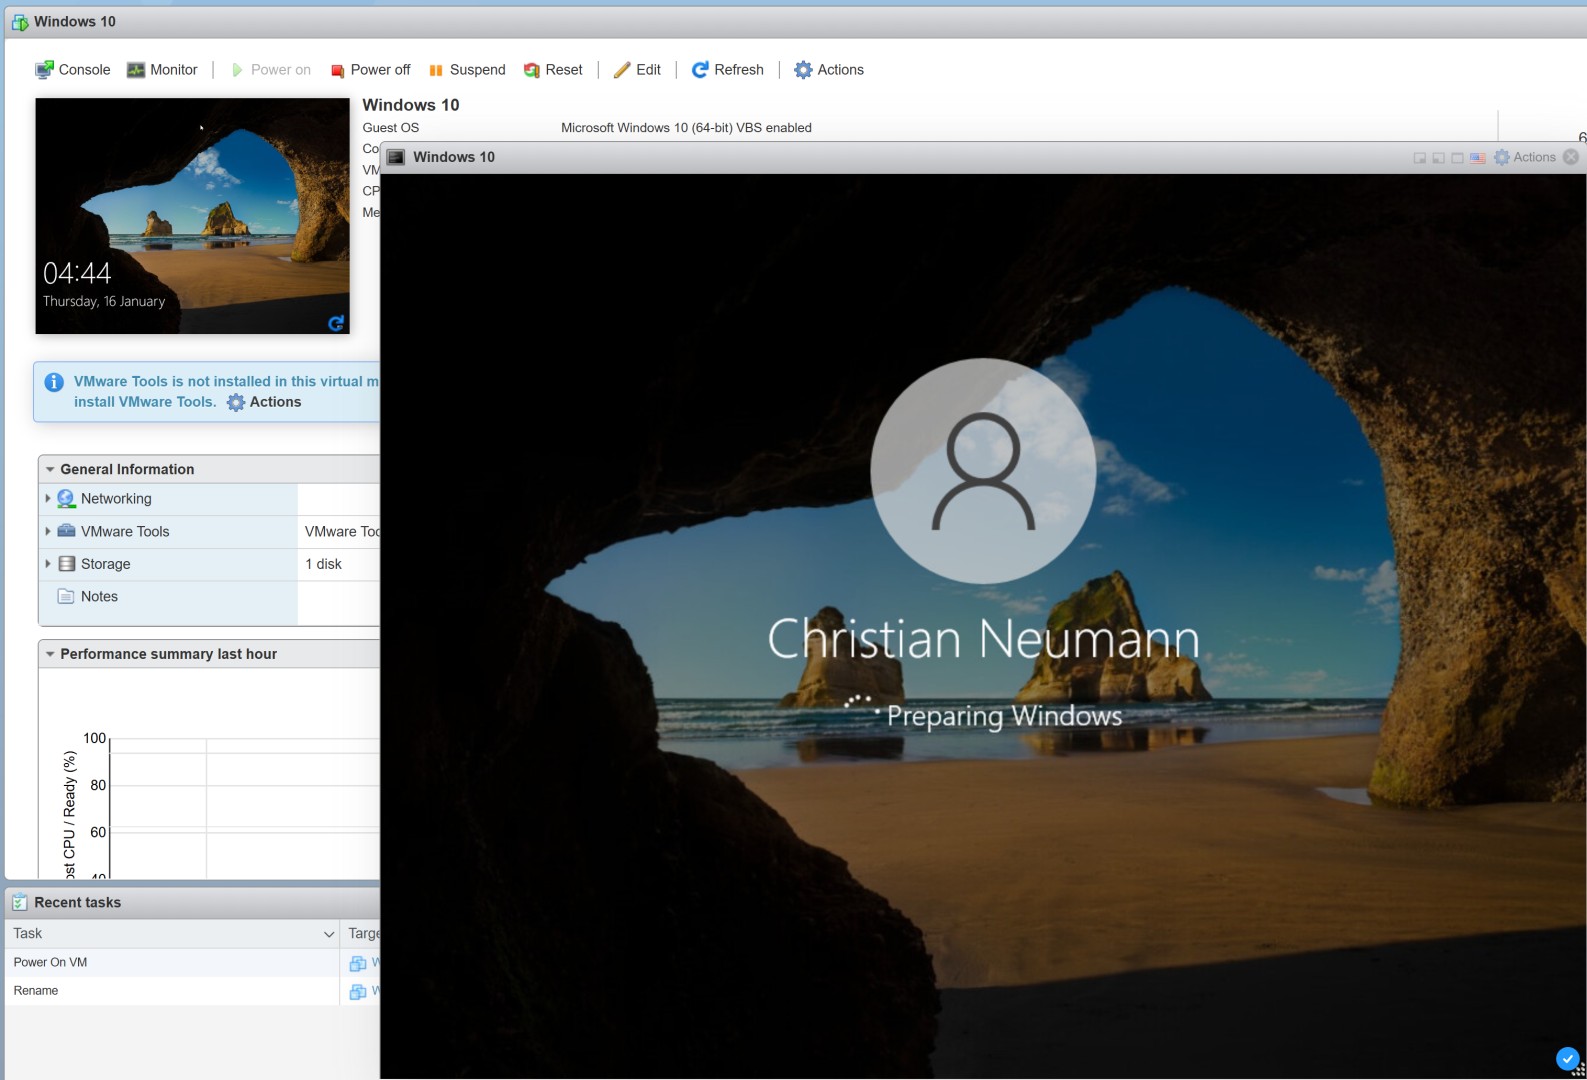
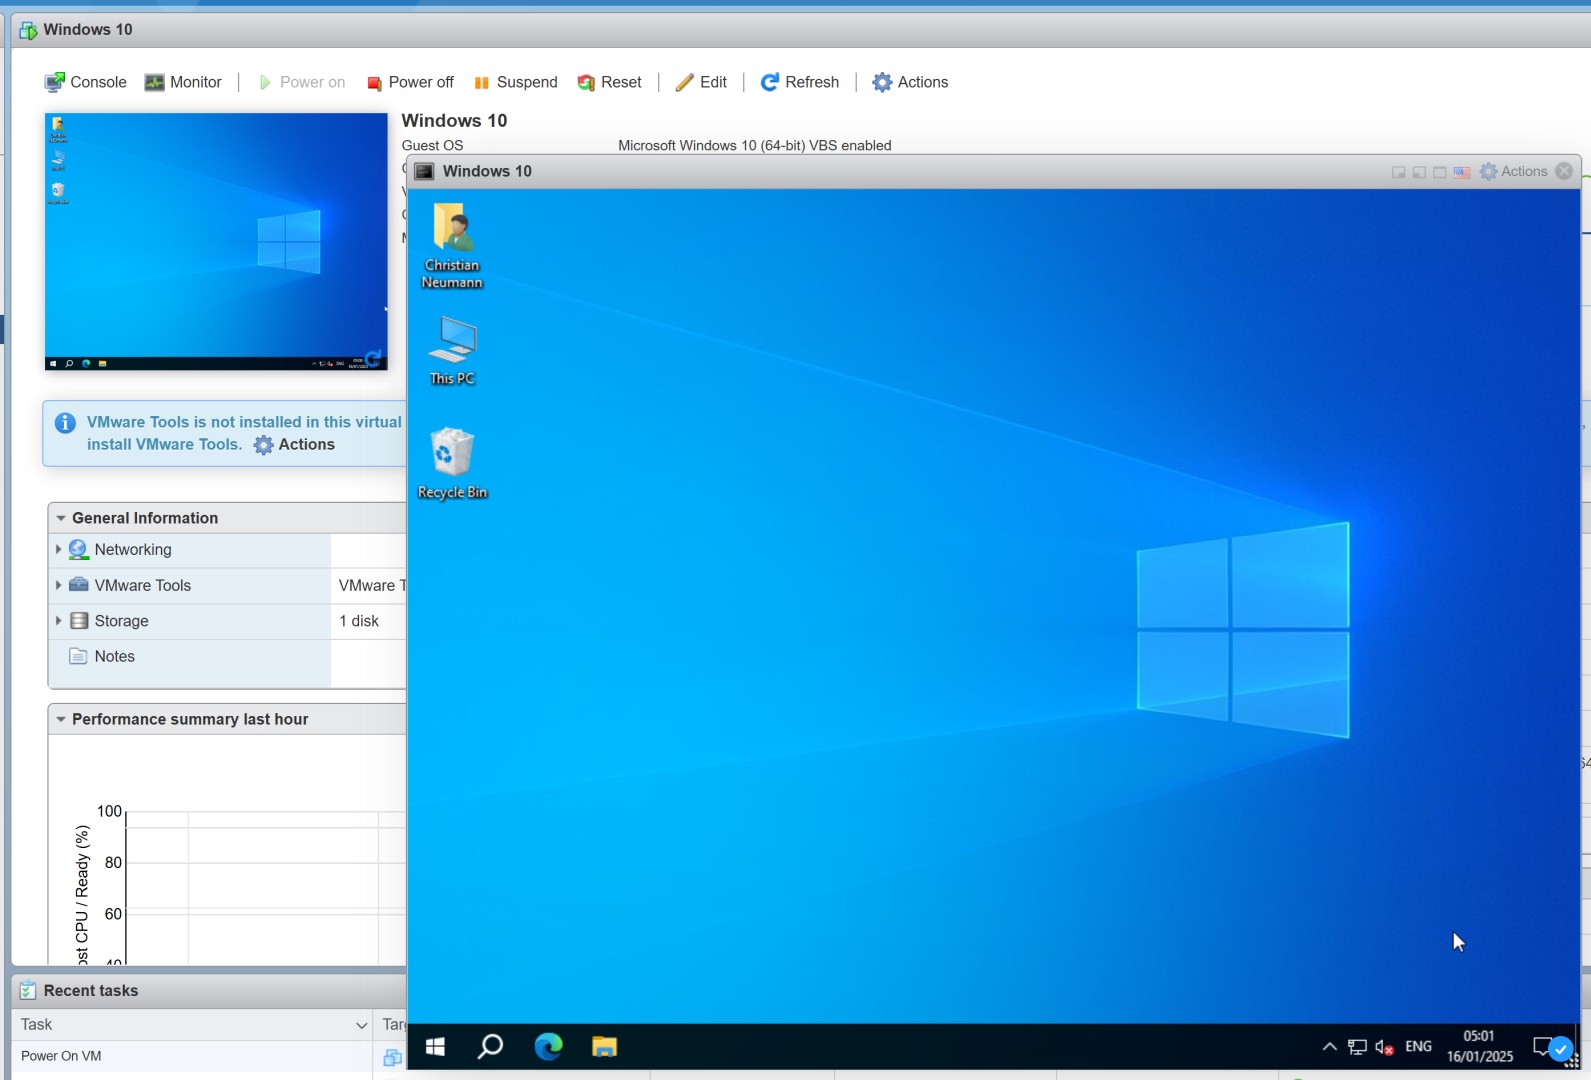
Step 20: First Login & Profile Setup
Windows sets up the user profile, and the domain user is now successfully logged in.
Conclusion
Congratulations! You have successfully set up an Active Directory domain and connected a Windows 10 client.
Now the client machine can:
Access network resources within the domain
Authenticate using domain credentials
Be managed centrally via Group Policies
This setup is essential for enterprise environments, allowing better security, administration, and scalability.
If you want to add more clients to the domain, simply repeat Steps 8-20 on additional machines.